
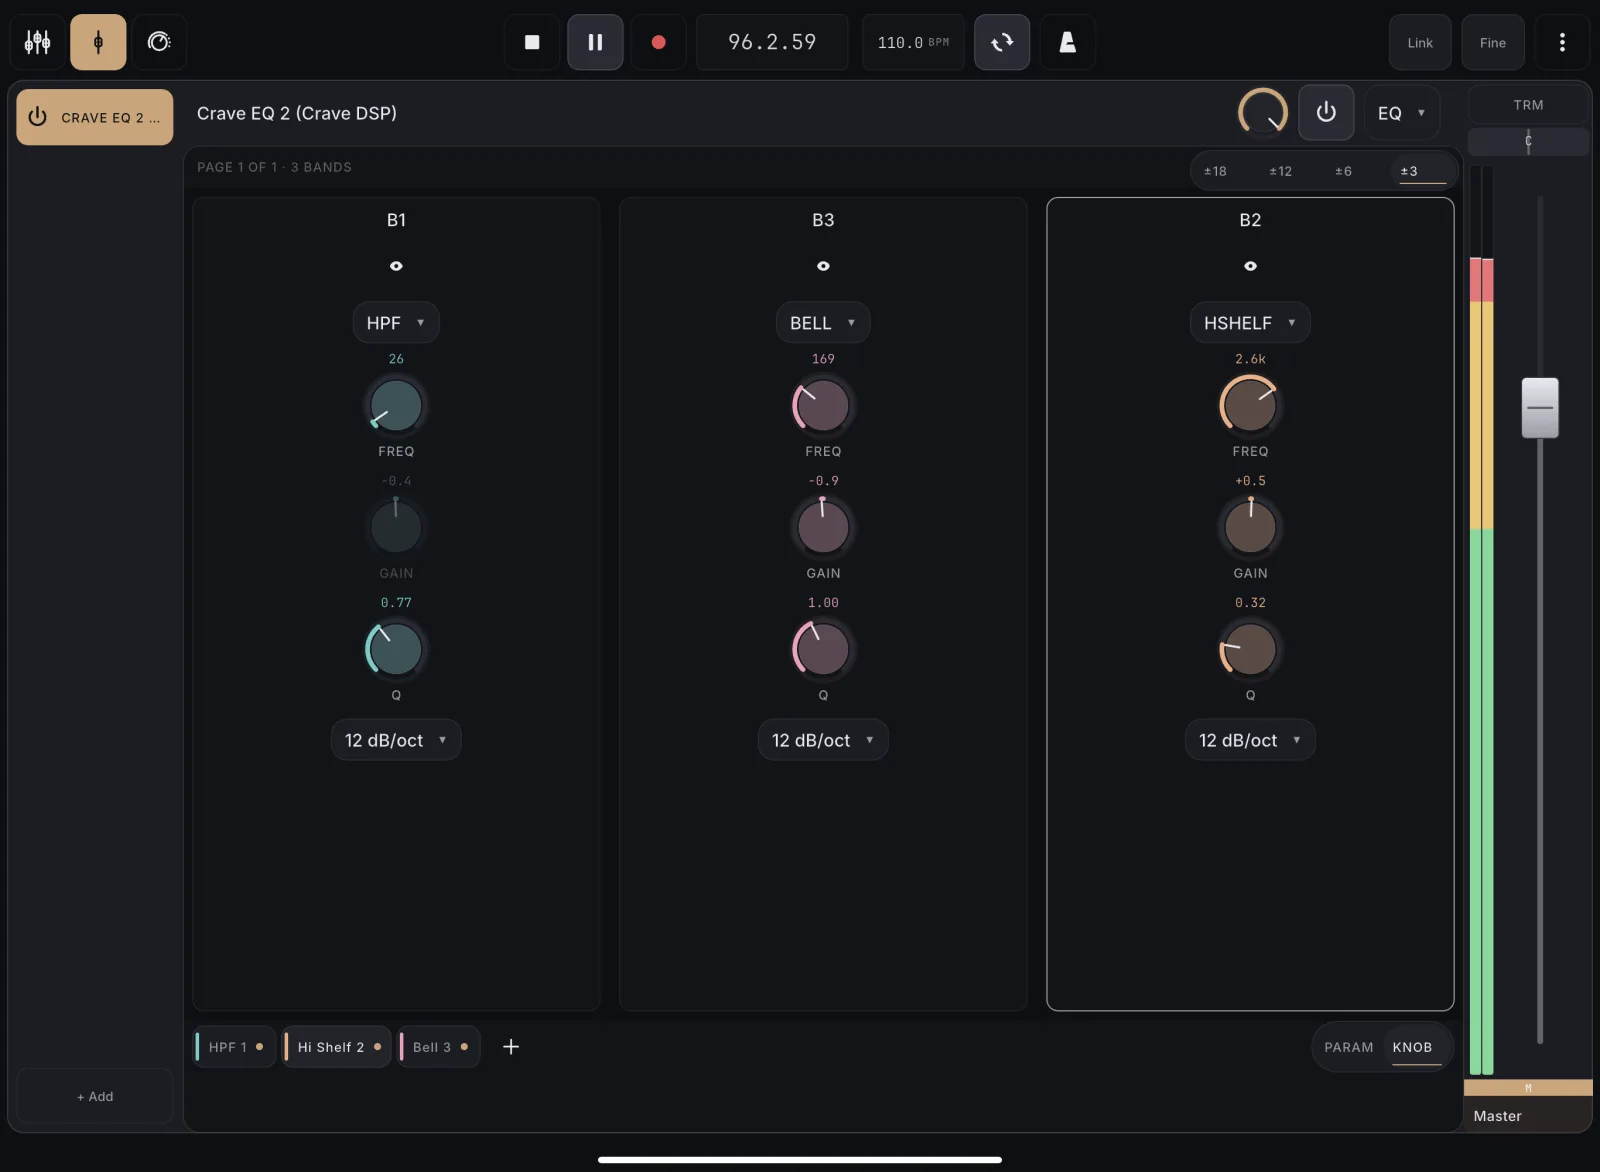
Trade the visual frequency curve for a dense column-per-band grid of knobs when you want to fly through every band's numbers quickly rather than think spatially.
How to use
- Tap the PARAM / KNOB segmented control at the right of the band-chip strip.
- KNOB mode shows every band as a column of controls, paginated 6 per page; PARAM returns to the curve.
Collapse the detail bar and band strip so the EQ curve fills the whole screen, then bring them back when you need a knob. Useful on any device, and the default on short screens where the curve would otherwise be a sliver.
How to use
- Look at the top-left corner of the EQ curve for the sliders button.
- Tap it to hide the detail bar and the band strip. The curve takes over the full height.
- Tap it again to bring the controls back.
Tips
- The curve is live either way: with the controls showing you can still drag bands, pinch a slope and double-tap to add a band. The sliders button is the only thing that hides them again.
- On a short screen (a small tablet or a phone in landscape) the controls start hidden and float over the curve when you show them, so the curve never shrinks.
- The controls float on top of the bottom of the curve, so a band you drag down there carries on moving out of sight. Hide the controls to see the whole curve again.
- Your choice sticks for the rest of the session, whatever the screen size.
- The dB zoom pill lives with the controls: it comes back when they do.
The fastest way to add a band, double-tap open space on the curve and a new band appears right there, ready to drag.
How to use
- Double-tap an empty spot on the curve (not on an existing band, and not directly on the curve line).
- A new band appears at that frequency/gain with a type guessed from the frequency zone.
Start a drag right on the curve line in open frequency territory to spawn a new band exactly where you touched, then keep shaping it in the same motion.
How to use
- Touch down near the curve line where no band exists yet.
- Drag. After a few pixels of travel a new band appears at your starting point, with a type guessed from that frequency zone (low = shelf/high-pass, mid = bell, high = shelf/low-pass).
- Keep dragging to shape the new band’s frequency/gain immediately.
Tips
- Lifting without moving (a tap) creates nothing. Only a real drag commits the new band.
Pick an exact filter shape up front (Bell, Shelf, Pass, Notch) instead of relying on the curve's frequency-zone guess.
How to use
- Tap the “+” icon at the end of the band-chip strip below the curve.
- Choose a filter type from the sheet that opens.
- The new band appears centered at 1 kHz / 0 dB, ready to drag into place.
Tips
- The “+” only shows on plugins that can really take another band. An EQ with a fixed set of bands has nothing to add, so no button appears.
- If the EQ has no free band slots left, MixSurface tells you instead of quietly doing nothing.
Remove a band you no longer want, instead of leaving it disabled and cluttering the strip.
How to use
- Select the band you want to remove, on the curve or from the chip strip.
- Tap the bin icon next to the eye in the band’s control bar.
- Confirm. The band disappears from the curve and the chip strip.
Tips
- The bin only appears on plugins whose bands can really be removed. On an EQ with a fixed set of bands there is nothing to delete, so no button shows.
- To silence a band without removing it, use the eye toggle instead. That is reversible with one tap.
Focus one band so its knobs, type, and slope respond in the detail bar below the curve, the starting point for every other EQ edit.
How to use
- Tap a band’s node on the curve, or tap its chip in the strip below the curve.
- The band’s spine color highlights and its controls populate the detail bar.
Tips
- The first band is selected automatically when you open the EQ, and again whenever the selected band disappears.
Grab a band directly on the curve and pull it to the frequency/gain you want (or frequency/resonance for a high/low-pass), watching the curve redraw live.
How to use
- Touch and hold a band’s node on the curve.
- Drag left/right to sweep frequency; drag up/down to sweep gain (or the cutoff steepness for a high/low-pass).
- Release to commit. REAPER’s automation write closes cleanly on lift.
Tips
- Dragging a bypassed band automatically re-enables it, so shaping just works without a separate tap first.
- Slow drags move at reduced, precise speed; fast drags track your finger 1:1.
Spread or squeeze two fingers to widen/narrow a bell, shelf, or notch's resonance, or to step a high/low-pass filter through its real slope options.
How to use
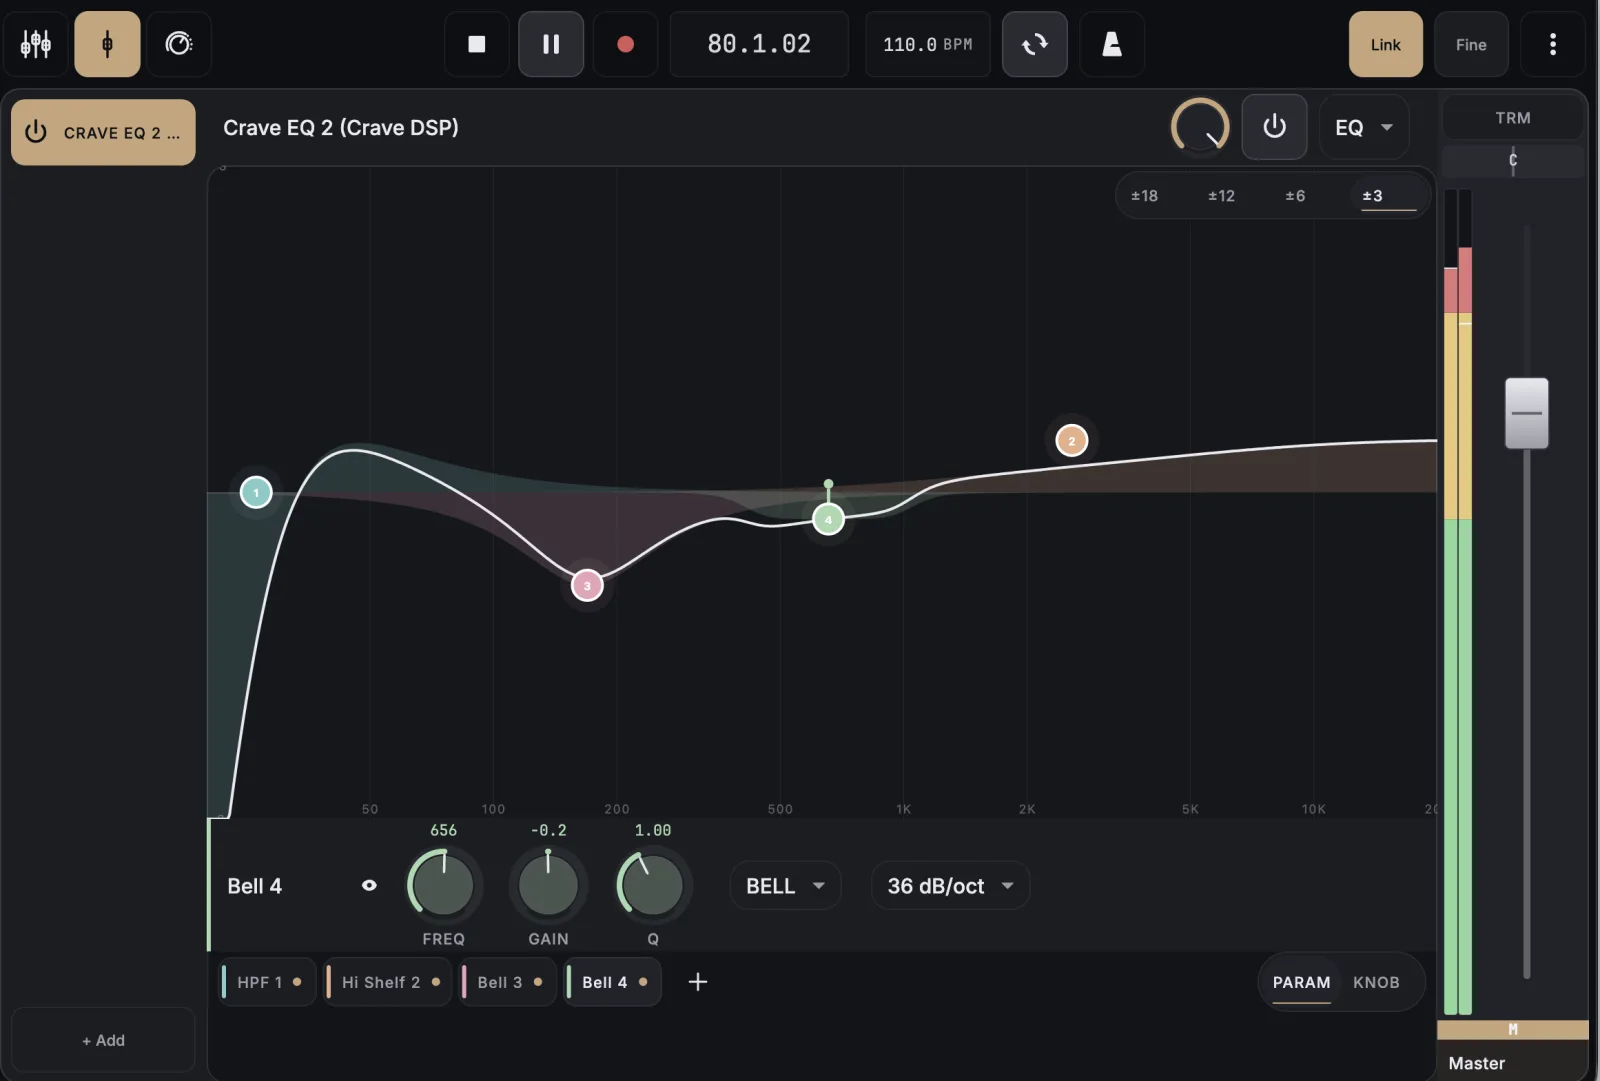
- Put one finger on a band’s node and a second finger anywhere else on the curve, or, if the band is already selected, pinch anywhere on empty curve space.
- Spread to sharpen (raise Q / steepen the cut); squeeze to soften.
- Lift both fingers to lock in the change.
Tips
- On a high/low-pass band this quantizes to the plugin’s real slope steps (e.g. 12/24/36/48 dB/oct) instead of a continuous Q.
Lock a drag to just frequency or just gain for a surgical, single-axis move, at the same slowed-down precision the other drags use.
How to use
- Rest three fingers on the EQ curve, over or near the band you want.
- Move slightly. The drag locks to whichever axis you moved along first (freq or gain), shown by a thin guide line through the band.
- Keep dragging along that locked axis; the other parameter stays frozen.
- Lift to commit the final position.
Tips
- A high/low-pass band only has a frequency axis to lock onto. There’s no gain to freeze.
Adjust the selected band's frequency, gain, and Q by dragging its knobs in the detail bar, precise vertical-drag control independent of touching the curve.
How to use
- Select a band.
- Drag a FREQ / GAIN / Q knob up or down; the live readout above the knob updates as you move.
- Double-tap a knob to reset it to its default position.
Tips
- There’s no numeric keypad entry. Knobs are drag-only, with double-tap-to-reset as the only shortcut.
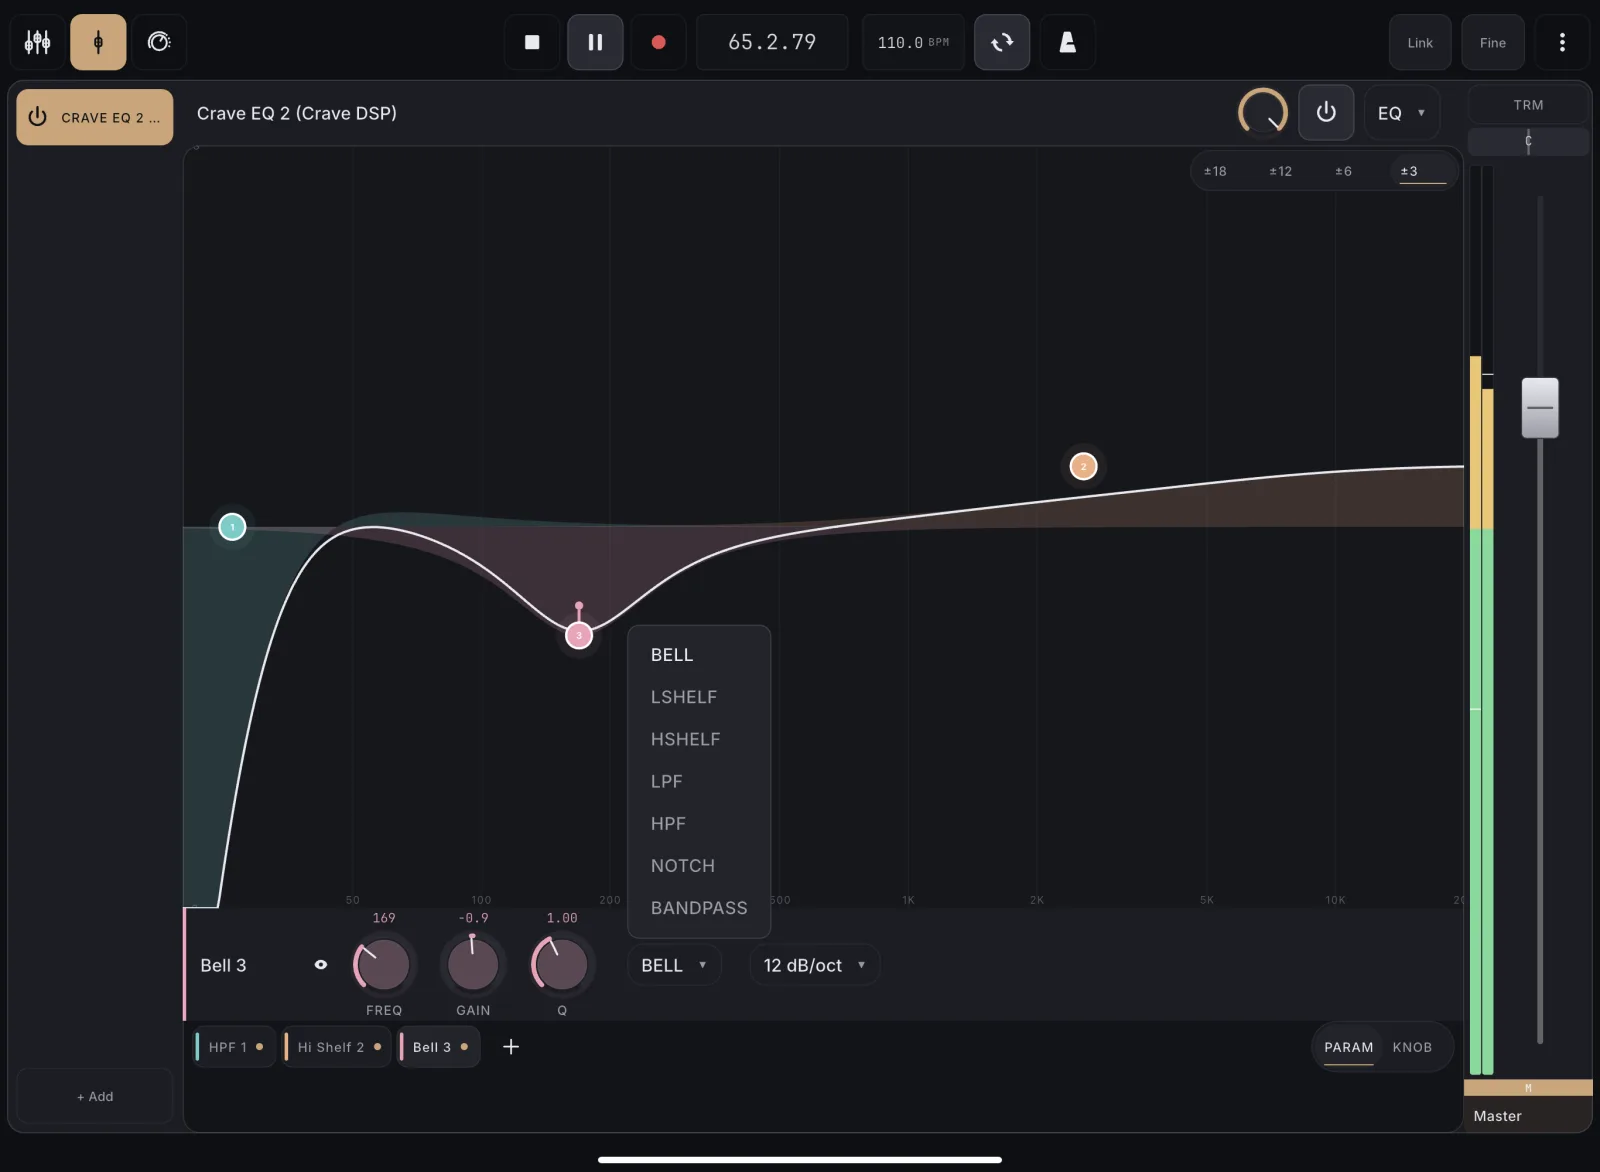
Swap a band between Bell, Shelf, High/Low-pass, Notch, and whatever other shapes the plugin supports.
How to use
- Select the band.
- Tap the TYPE dropdown in the detail bar.
- Pick a shape from the list.
Tips
- On plugins with fixed, hardware-style bands (e.g. Oxford EQ’s named filters), some bands have a permanently locked type and the dropdown appears dimmed.
A tilt band pivots at its frequency: everything below goes down, everything above goes up, by the same amount. Use it to brighten or darken a whole mix in one move.
How to use
- Select a band, tap the TYPE dropdown, and pick Tilt Shelf.
- Drag the band node up to brighten (lows come down, highs go up) or down to darken.
- Drag it left or right to move the pivot, the frequency that stays at 0 dB.
- Use SLOPE to set how abruptly the tilt turns over at the pivot, and Q to sharpen the knee.
Tips
- Tilt Shelf flattens out into plateaus at both ends: the full amount of cut below, the full amount of boost above. It is not half each way.
- Pro-Q 3 and Pro-Q 4 also offer Flat Tilt, which never flattens out. It keeps climbing at a constant rate all the way across, so it reads as a straight line on the curve. Q and slope do nothing there, and the surface greys them out to say so.
- Pushing Q up past about 2 makes the tilt overshoot its own plateau near the pivot, a small bump on the boost side and a dip on the cut side. That is the plugin’s real behaviour, and the curve draws it.
- Pro-Q 4’s All Pass is drawn as a flat line, because an all-pass filter changes phase and leaves the level alone. Its frequency and Q still do something audible, you just cannot see it on a level curve.
On plugins that model several analog flavors per band, like a Pultec-style boost/cut pair or a resonant vs. plain shelf, choose which one this band behaves like.
How to use
- Select a band whose plugin exposes subtypes. A second dropdown appears next to TYPE.
- Tap it and choose a subtype.
- If that subtype adds a “Shift” or “Gain↔Q” knob, drag it to dial in the resonance/interaction.
Choose the exact rolloff steepness (dB/octave) for a shelf or cut from the plugin's real slope options, when it's exposed as a discrete list rather than a continuous knob.
How to use
- Select the band.
- Tap the SLOPE dropdown in the detail bar.
- Choose a dB/oct value from the list.
Tips
- Some plugins (e.g. Pro-Q 4) expose slope as a continuous knob instead of a list. Drag it like any other knob.
Some bands carry one extra knob beyond freq/gain/Q/type, like Oxford EQ's per-band 'Overshoot', for a plugin-specific tweak that doesn't fit the standard set.
How to use
- Select a band that has an aux control. It appears in the detail bar’s right-hand slot.
- Drag the knob to adjust it; the readout shows the plugin’s own formatted value when available.
Some EQs have one control that colors the whole unit rather than a single band, like Oxford EQ's overall 'Eq Type' character, surfaced once instead of duplicated on every band.
How to use
- Look at the right end of the detail bar: a single global control shows inline, tagged “GLOBAL”; more than one shows behind a chevron button.
- Tap the control directly, or tap the chevron first to open the sheet, then change it.
Tighten the vertical scale to see subtle moves clearly, or widen it to keep a big boost/cut in view.
How to use
- Tap ±30 / ±18 / ±12 / ±6 / ±3 in the top-right corner of the curve.
- The curve and its gridlines rescale immediately.
Tips
- ±30 keeps a big boost or a deep cut fully on screen. ±3 makes half-a-dB moves readable.
- The scale is remembered per plugin instance, so each EQ keeps the zoom you left it at.
Stop re-picking your favorite dB range every time you open a new EQ instance. Bake it in once for every EQ that doesn't have its own saved range yet.
How to use
- Set the zoom to the range you want (see “Zoom the curve’s dB range”).
- Long-press the zoom control.
- Confirm “Set Default” in the dialog that appears.
Re-sort the band columns low-to-high after adding bands out of order, so the grid reads like the curve does.
How to use
- In Knob view, tap the sort icon in the header bar.
- Columns rearrange by ascending frequency.
See which EQs get the full parametric surface#
UnlockThe multi-touch curve, drag/pinch gestures, and per-band control bar only light up for EQ plugins MixSurface has mapped. Every other plugin still opens, just as the standard auto-built knob grid.
How to use
- Open an FX slot running a mapped EQ. The parametric curve loads automatically instead of the generic control grid.
- Mapped today: REAPER’s own ReaEQ, plus Crave EQ 2 (Crave DSP), Pro-Q 2/3/4 (FabFilter), MB EQ (Metric Halo), MDWEQ6 (Massenburg DesignWorks), Big FrEQ (Empirical Labs), Oxford EQ (Sonnox), and EQuilibrium (DMGAudio), 10 EQs in total.
- The drawn curve mirrors each plugin’s real response, its shelf shapes and its filter slopes, so what you see on the surface matches what the plugin does.
- Any other EQ still works fully. It just renders as the standard auto-built knob/fader grid rather than the curve.