
Channel Detail
The FX chain, plugin picker, plugin templates, GR meter, delta-solo, and dry/wet.
Guides: Clean up a plugin's auto-generated layout · Control item FX (take FX) from your iPad or Android tablet · Move, line up and resize controls on a page · Change a control's type, label, colour and value readout · Group controls into a labelled section · Add a track level meter or a gain-reduction meter · Make a layout fit a phone, a tablet and both orientations · Make fine adjustments with Fine mode and focus zoom · Re-bind a control to a different parameter or track · Add, ride and remove one track's sends in Channel Detail · Mix a reverb or monitor bus from its receives · Listen mode doesn't pick up a parameter or action · Build your own plugin template · Ride your sends
Open a plugin in the FX chain#
UnlockJump into a plugin's controls, EQ curve, or gain-reduction reading by tapping its slot in the chain.
How to use
- Open Channel Detail for a track (double-tap a channel’s name plate in the Mixer).
- Tap any plugin slot in the FX chain rail on the left.
Tips
- Tapping a container drills into it instead of opening it directly. See “Look inside an FX container”.
Walk through your tracks one at a time without leaving Channel Detail, in the same order the Mixer shows them, so checking every track's FX or sends is one tap per track.
How to use
- Open Channel Detail for a track.
- Tap › above the channel strip on the right to move to the next track, or ‹ for the previous one.
- The arrow at the first or last track is greyed out. The order does not wrap around.
Tips
- The order is the Mixer’s: the current layer, without hidden or collapsed tracks, and pinned tracks where the Mixer shows them. The master is in it only if the Mixer shows the master.
- Stepping selects the track in REAPER too, just like opening it from the Mixer.
- If you were looking at SENDS, the next track opens in SENDS as well.
- When the channel strip is hidden (portrait or a narrow screen), the arrows move into the ⋯ menu as Previous track and Next track.
- While you are editing a template the arrows are hidden, so a stray tap cannot move you off the template.
Land on a useful plugin automatically#
UnlockChannel Detail opens straight onto the first active plugin in the chain instead of an empty pane, so there's always something useful to look at.
How to use
- Double-tap a channel’s name plate in the Mixer.
- Channel Detail opens with the first active plugin already focused, no tap needed.
Tips
- If every plugin is bypassed or offline, the first one in the chain opens anyway.
- An empty chain, or one with only containers, shows “Tap a slot to open” instead.
Switch how a plugin is shown#
UnlockChoose between the specialized EQ curve, your saved custom layout, or the auto-generated grid for the focused plugin.
How to use
- Focus a plugin in Channel Detail.
- Use the mode dropdown in the header to pick EQ, Template, or Generic.
Tips
- EQ plugins offer EQ + Generic; everything else offers Template + Generic, never both pairs at once.
- The dropdown hides itself when there’s only one option, or while a template edit session is open.
Look inside an FX container#
UnlockSee and manage the plugins living inside a REAPER FX container without leaving Channel Detail.
How to use
- Tap a container slot in the FX chain rail (marked with a trailing chevron).
- The rail switches to that container’s plugins. Open, reorder, add, delete, or bypass them exactly like the top-level chain.
- Tap the back chevron to pop up one level.
Tips
- A container inside a container drills further, to any nesting depth.
- Opening a plugin that lives inside a container shows its normal header: name, on/off, mode dropdown, and Edit, exactly like a top-level plugin, with the rail’s back chevron alongside it.
Open a mapped EQ plugin#
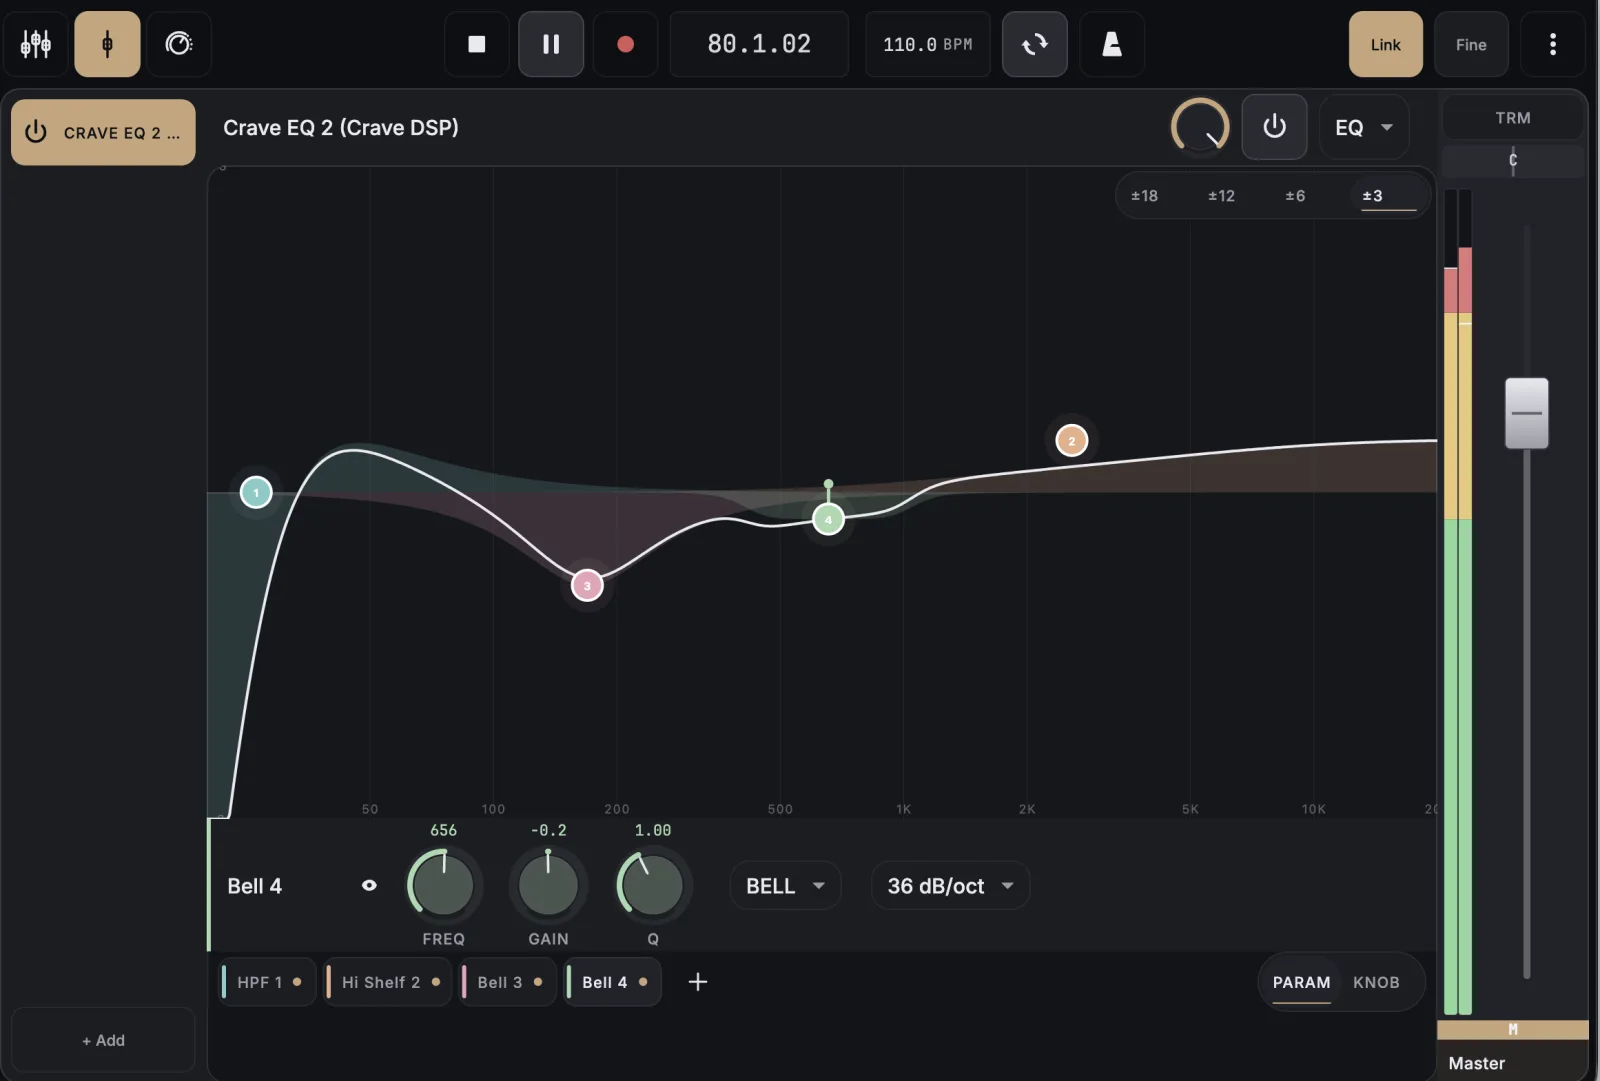
UnlockGet the dedicated multi-touch EQ curve automatically when you open a recognized parametric EQ, instead of a generic knob grid.
How to use
- Tap a mapped EQ plugin’s slot (e.g. ReaEQ, FabFilter Pro-Q, Crave EQ).
- Channel Detail opens straight onto the multi-touch EQ surface.
Tips
- See the EQ surface area for how to create, drag, and shape bands on the curve itself.
- Switch to Generic from the mode dropdown if you ever want the plain knob grid instead.
Add a plugin to the chain#
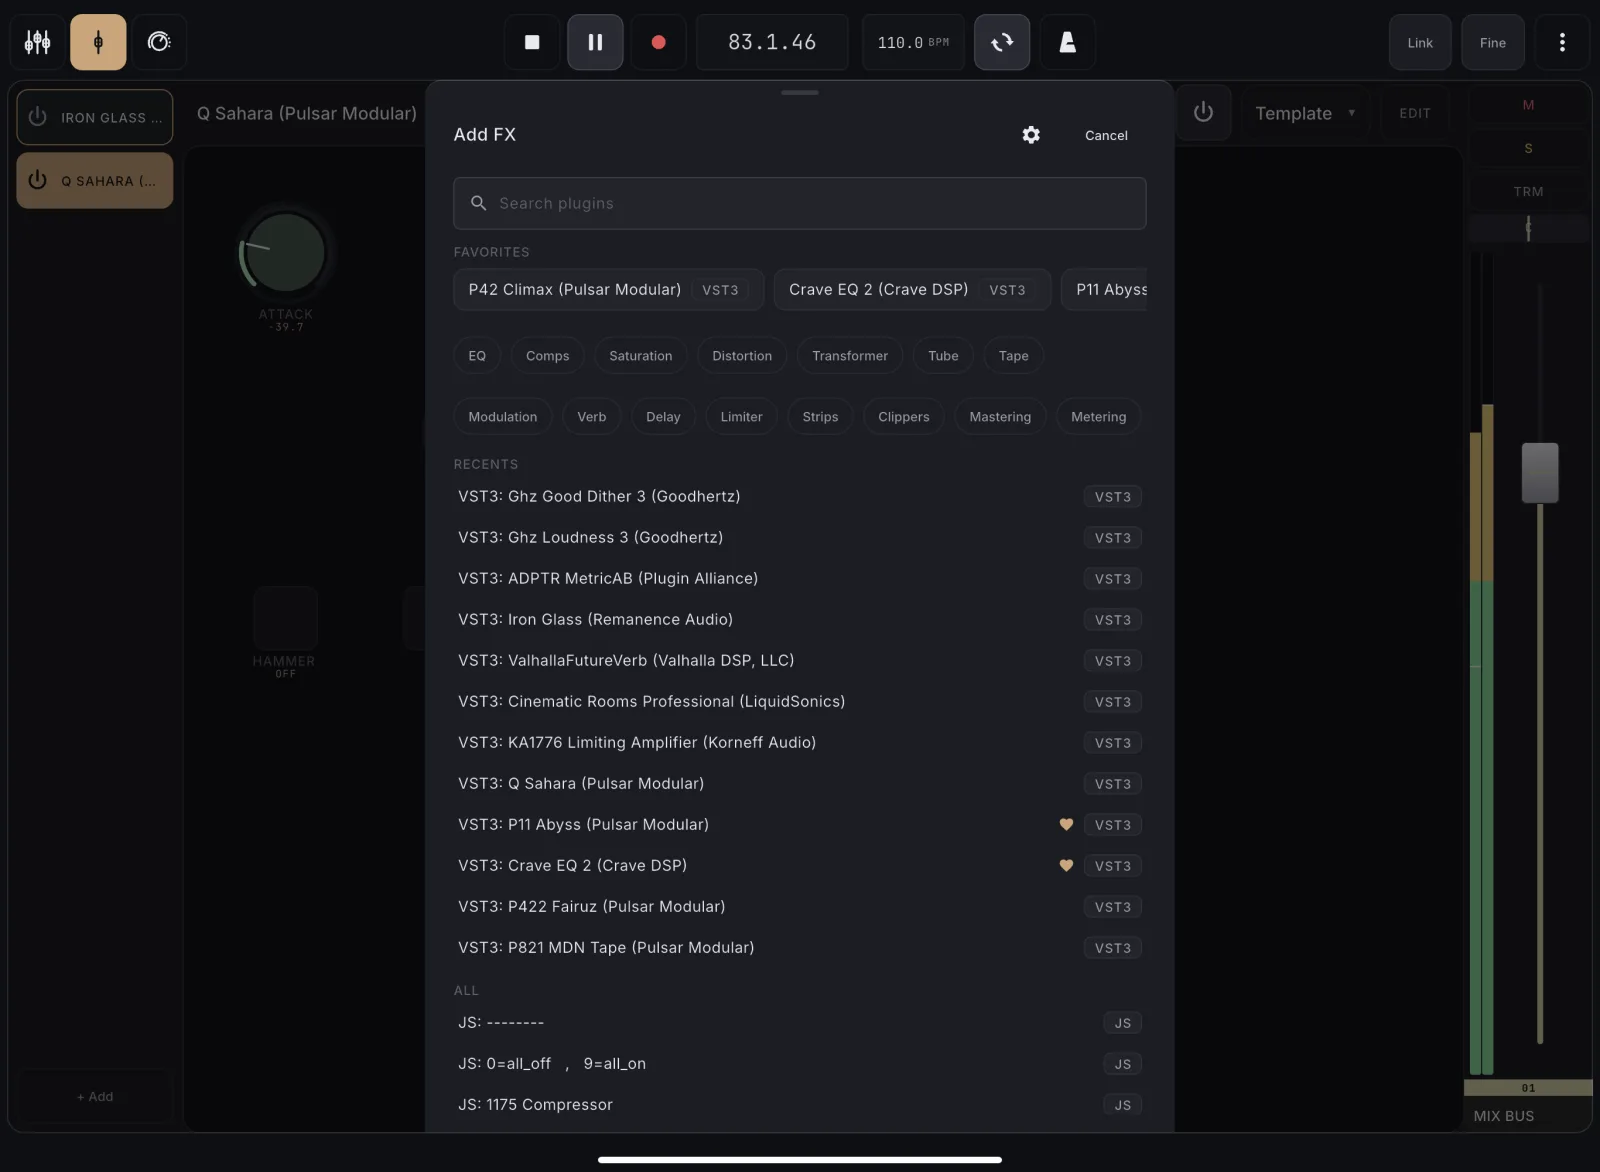
UnlockInsert a new plugin at the end of the FX chain from REAPER's full installed-plugin library.
How to use
- Tap “+ Add” at the bottom of the FX chain rail (or inside a container you’ve drilled into).
- Browse Recents or All, search, or filter by tag.
- Tap a plugin to add it. The sheet closes and it’s appended.
Tips
- The new plugin opens automatically in the middle column, no extra tap needed.
- Works inside an FX container too, including one that’s still empty.
Work on an item's FX in Channel Detail#
UnlockGive each song on an album mastering track its own chain and work on it with the same templates and EQ surface as a track's FX.
How to use
- Open an item’s FX: tap its FX badge in Arrange, use the Item FX button, or select the item in REAPER with Link on.
- The banner shows ITEM and the item’s name.
- Work on the chain as on a track: add, reorder and bypass plugins, open templates and the EQ surface.
- The fader is the item’s volume, the pan is the take’s pan, M mutes the item, and the meter is the track’s.
- Tap the ‹ › arrows in the banner to step to the previous or next item on the same track. REAPER selects that item too.
- Tap Track FX in the banner to return to the track.
Tips
- Items have no sends, solo or automation here.
- If the item is deleted in REAPER, Channel Detail returns to its track.
- Templates you made on a track work on an item with the same plugin.
With Link on, selecting an item that has FX in REAPER moves Channel Detail to that item's FX, and selecting a track moves it back.
How to use
- Turn Link on.
- In REAPER, select an item that has FX. Channel Detail moves to that item’s FX.
- Select a track in REAPER. Channel Detail moves back to that track.
Tips
- An item without FX, or several items selected, changes nothing.
- Whichever you selected last wins.
Change the signal-flow order of plugins on a track by dragging them into place.
How to use
- Long-press any slot in the FX chain rail to enter rearrange mode.
- Drag slots into the new order, or tap the × on a slot to remove it, then confirm the deletion.
- Tap Done to exit rearrange mode.
Tips
- Works identically inside a drilled-in FX container. It reorders (or removes from) just that container’s contents.
Bypass a plugin#
UnlockTemporarily switch one plugin off without removing it, to A/B compare a mix with and without its processing.
How to use
- Tap the power icon on a plugin’s slot in the FX chain rail, or the power icon in the header of the focused plugin, to bypass it.
- Tap it again to re-enable.
- Long-press the header’s power icon instead to take the plugin fully offline, handy for a CPU-hungry plugin you don’t need right now. Long-press again to bring it back online.
Tips
- Bypass keeps the plugin loaded but silent; offline unloads it entirely to free CPU.
- Offline is only available from the header power icon. The FX chain rail’s leading power icon only bypasses.
Blend how much of a plugin's processed signal comes through, right from the header, no need to hunt for a mix knob inside the plugin's own UI.
How to use
- Open a plugin in Channel Detail.
- Find the small Mix knob in the header, left of the on/off button.
- Drag it to taste.
- Double-tap it to snap back to 100% wet.
Tips
- Hidden automatically for plugins that don’t expose a REAPER :wet parameter.
Hear only a plugin's contribution to the signal, isolated from the dry source, handy for judging exactly what a compressor or EQ is doing.
How to use
- Open the plugin whose effect you want to isolate.
- Long-press the Mix knob in the header.
- It flips to a filled Δ chip. You now hear only the plugin’s contribution.
- Tap the Δ chip to exit and return to normal listening.
Tips
- Only available on plugins that expose a REAPER :delta parameter. The long-press does nothing otherwise.
Filter the picker by tag#
UnlockNarrow the Add FX picker to plugins you've organized under a tag, like 'Vocal chain' or 'Mix bus'.
How to use
- Open the Add FX picker.
- Tap a tag chip below the search field.
- Tap it again to remove the filter. Combine several tags for a narrower list.
Combine tag filters with AND or OR#
UnlockControl whether selecting several tags shows plugins in ALL of them or in ANY of them.
How to use
- Open the Add FX picker.
- Tap the settings gear.
- Under Combine tags, choose AND (must match every selected tag) or OR (matches any).
Mark a plugin you reach for constantly so it's always one tap away in the picker's Favorites strip.
How to use
- Open the Add FX picker.
- Long-press a plugin row.
- Tap “Add to favorites”.
Tips
- Long-press again and choose “Remove from favorites” to un-favorite.
- Once favorited, tap its chip in the Favorites strip at the top of the picker to add it to the chain in one tap. The strip only appears once you have at least one favorite.
Rearrange or remove chips in your Favorites strip to match how often you reach for each plugin.
How to use
- Open the Add FX picker.
- Long-press any Favorites chip to enter edit mode.
- Drag chips to reorder, or tap the × to remove one.
- Tap Done to exit.
Group plugins into your own named categories, beyond Favorites, so you can filter the picker by workflow.
How to use
- Open the Add FX picker.
- Long-press a plugin row.
- Tap “Add to tag…”.
- Pick an existing tag, or tap “+ New tag” and name it.
Rename or remove a custom tag once you no longer need it.
How to use
- Open the Add FX picker.
- Long-press a tag chip in the filter row.
- Tap “Rename…” or “Delete tag”.
- Confirm the deletion.
Import your REAPER FX folders as tags#
UnlockTurn your existing REAPER FX folders into MixSurface tags in one tap, instead of re-organizing plugins by hand.
How to use
- Open the Add FX picker.
- Tap the settings gear.
- Tap “Import from folders”.
Tips
- Safe to run more than once. It only adds new tags/members, never removes anything.
Rebuild MixSurface's plugin list on demand, for when you installed something while REAPER was already running.
How to use
- Open the Add FX picker.
- Tap the refresh icon next to the settings gear.
- The list rebuilds and a confirmation shows how many plugins were found.
Tips
- Use this after installing a plugin while REAPER is already running, even after REAPER’s own rescan finished. MixSurface caches the plugin list separately and a plain rescan does not always tell it to refresh.
- If a plugin is still missing after refreshing, run REAPER’s own FX browser, “Scan for new plugins”, first. Refresh only reloads what REAPER already knows about, it cannot discover a plugin REAPER itself hasn’t found yet.
Choose your preferred plugin format#
UnlockPick which plugin format (VST3, AU, etc.) shows when the same plugin is installed in more than one format, or list every format as its own row.
How to use
- Open the Add FX picker.
- Tap the settings gear.
- Under Format, choose your preferred format, or choose “All” to list every variant.
Tips
- Plugins available in only one format are never hidden or affected, regardless of your preference.
- The preference applies uniformly on every tab of the picker, on this device only.
View any plugin's controls automatically#
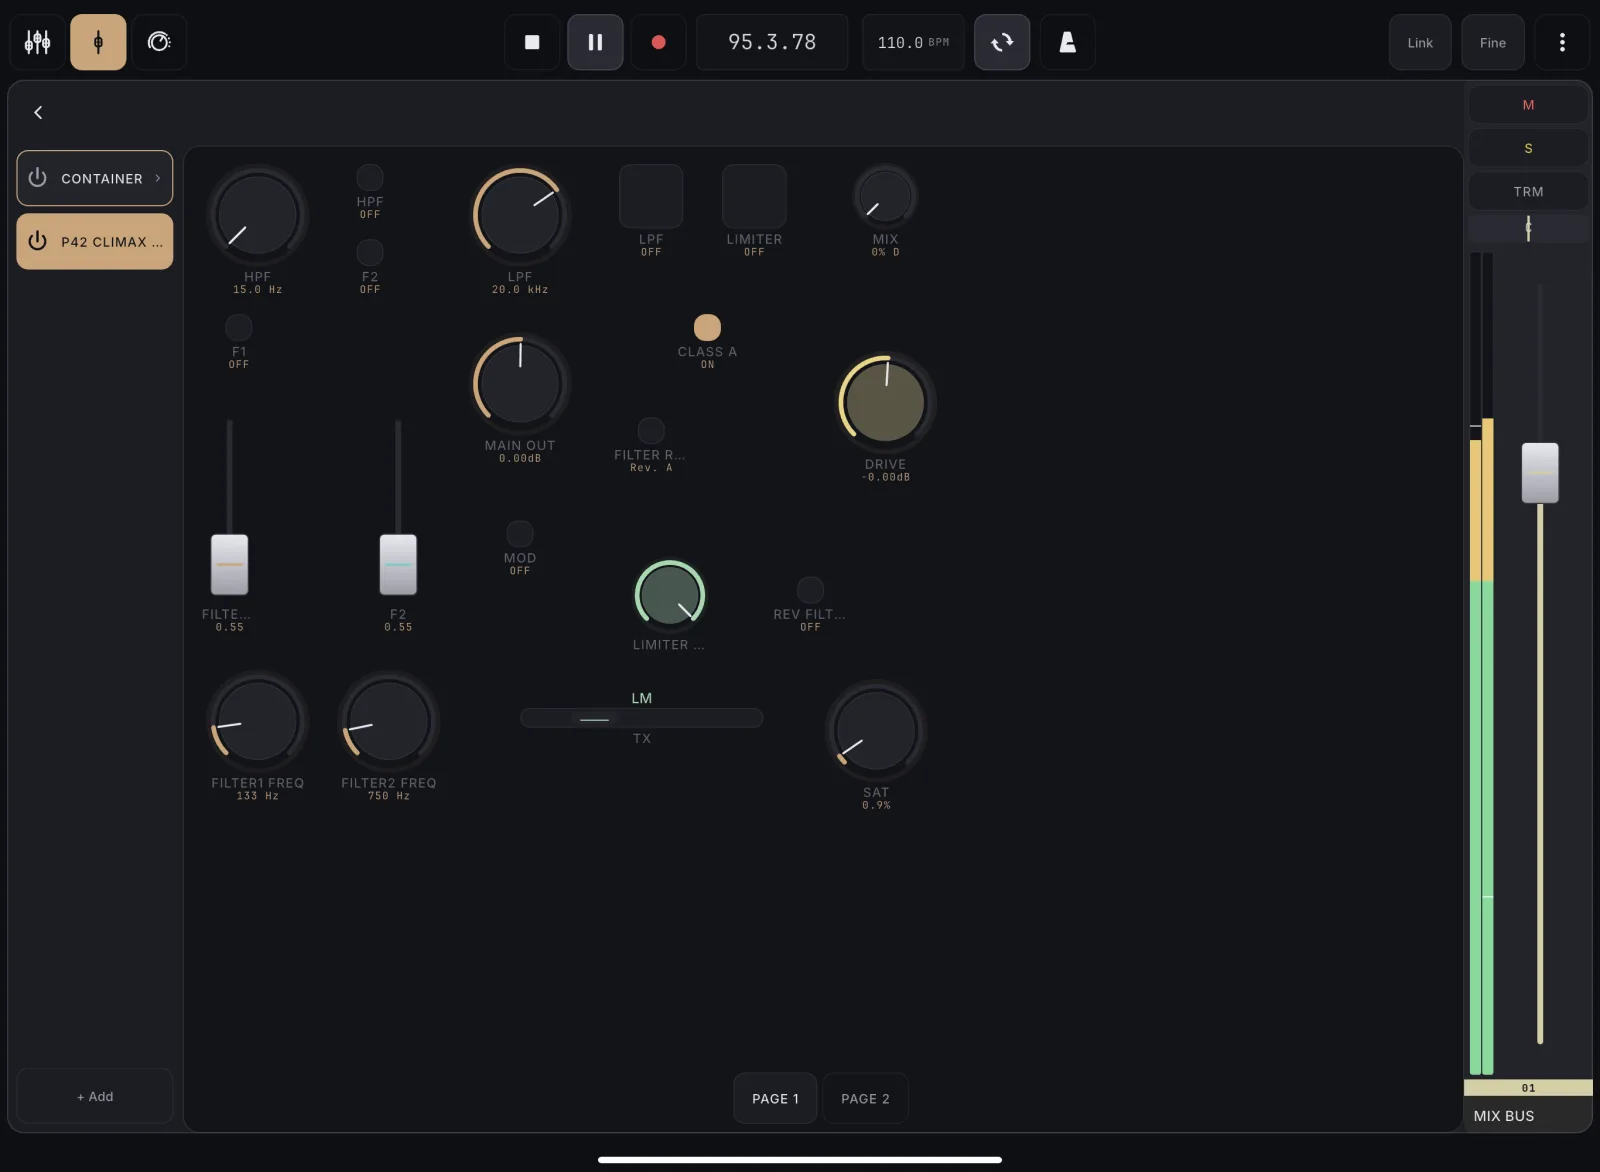
UnlockGet usable knobs, buttons, and dropdowns for any plugin instantly, even ones nobody has built a custom layout for.
How to use
- Open any plugin that has no saved template.
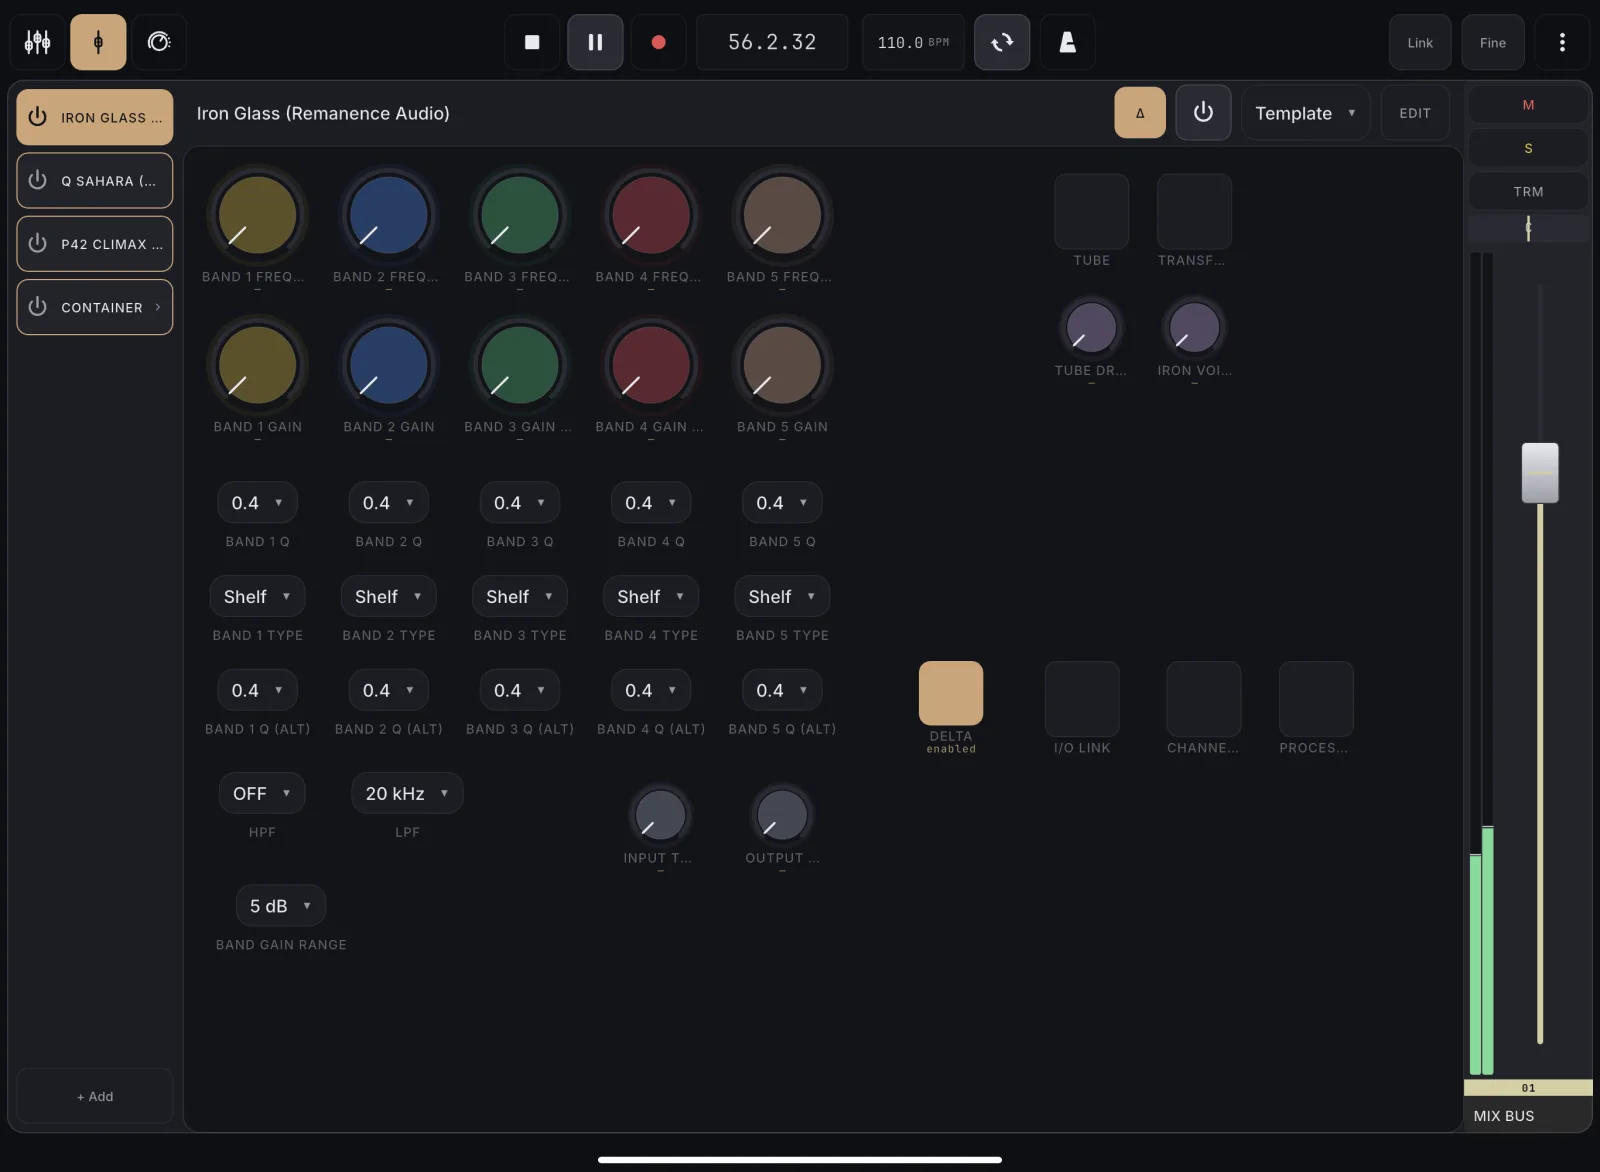
- Channel Detail auto-lays-out every readable parameter as a grid of knobs, toggle buttons, and dropdowns.
Tips
- More parameters than fit on your device’s screen? The grid splits into pages sized to that device. Tap a page tab in the bar below the canvas to flip between them. A smaller screen simply shows more pages.
- A plugin with no readable parameters offers “Start mapping” to build a custom template instead.
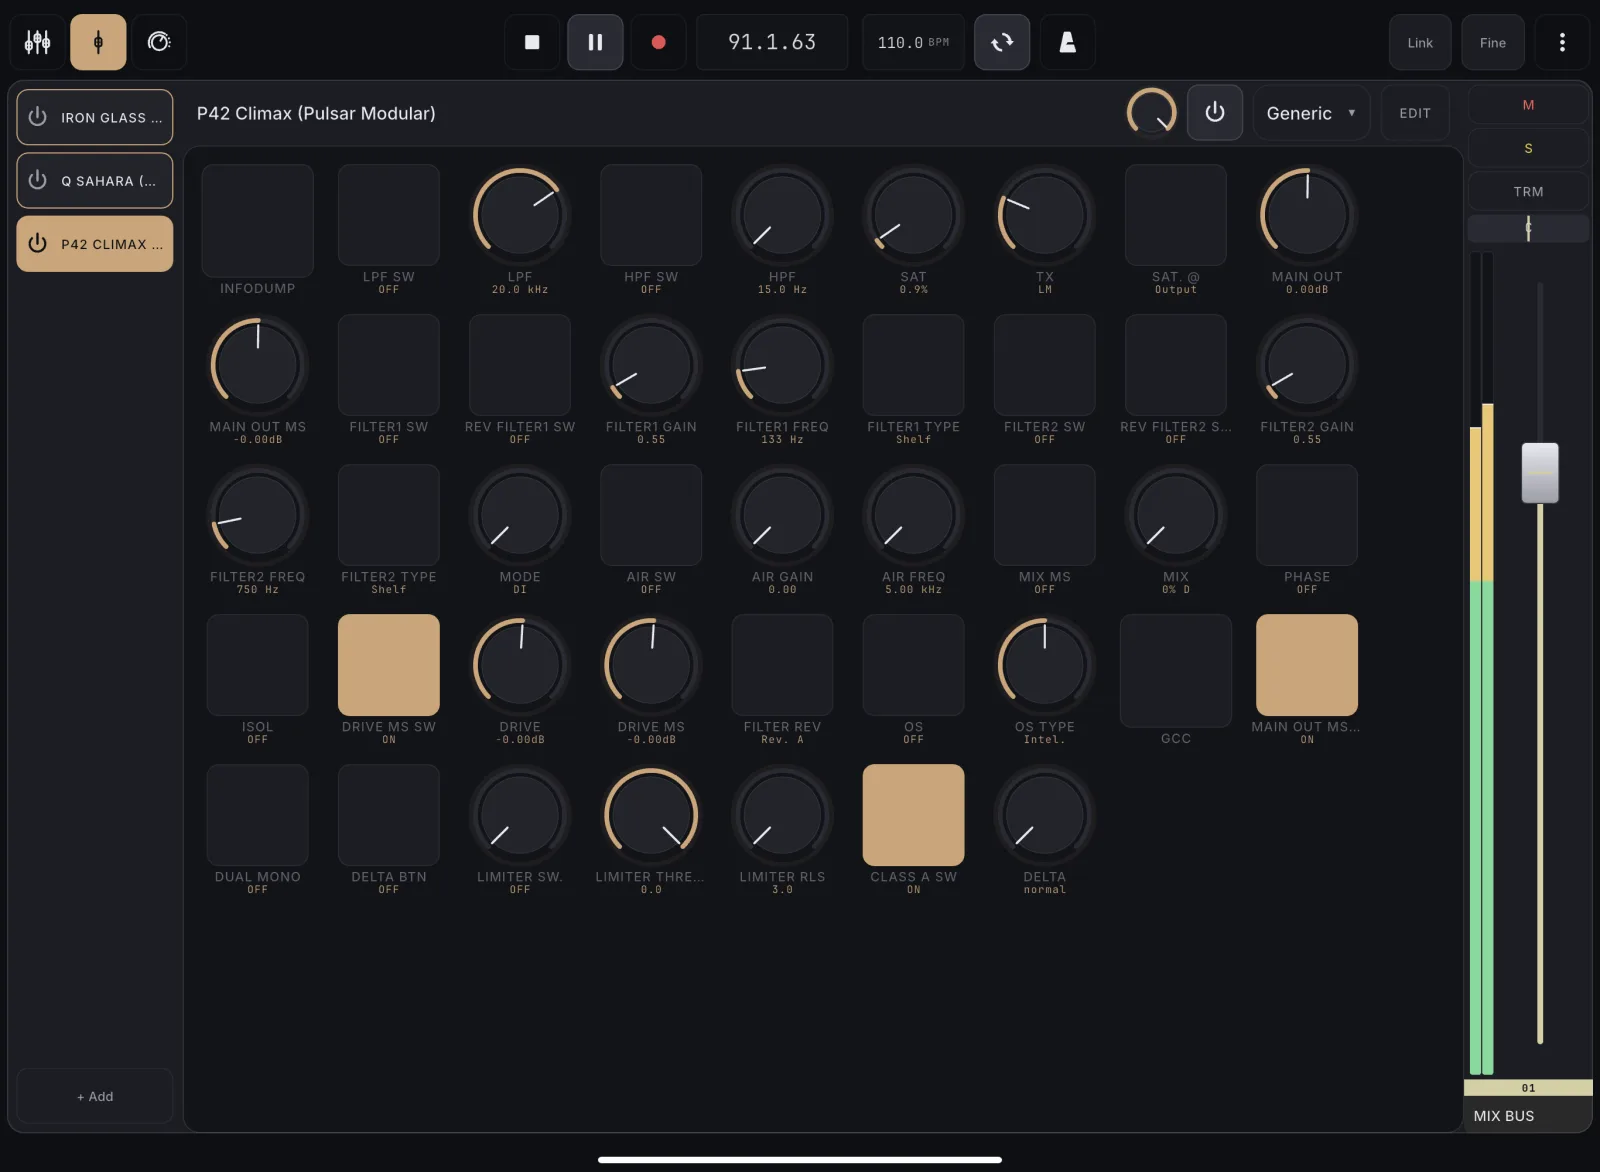
Turn a plugin's auto-generated grid into your own editable, saved layout, or start from a blank template. Tap Edit and pick how you want to begin.
How to use
- Open a plugin that shows the auto-generated grid (the Generic view).
- Tap Edit in the plugin header.
- Choose how to begin:
- Edit detected layout keeps every control the auto view found and drops you straight into editing it.
- Start fresh opens an empty template so you build from scratch by touching params in REAPER (listen mode).
- Arrange the layout: move, resize, delete, or add controls, and flip between pages with the page bar.
- Tap Done to save it as this plugin’s layout, or Cancel to discard and return to the auto view.
Tips
- Pick Edit detected layout when the auto grid is close to what you want. Pick Start fresh when the plugin dumped dozens of params you’ll never touch.
- Editing works from the very first tap, before you ever save: the page bar and the Delete-page button are there for the whole session, so you can clean up a big auto layout page by page.
- If the auto view spilled onto more than one screen, the whole layout carries over, not just the first page, and it re-flows into pages sized to whatever device you open it on.
- Cancel is safe: nothing is saved until you tap Done.
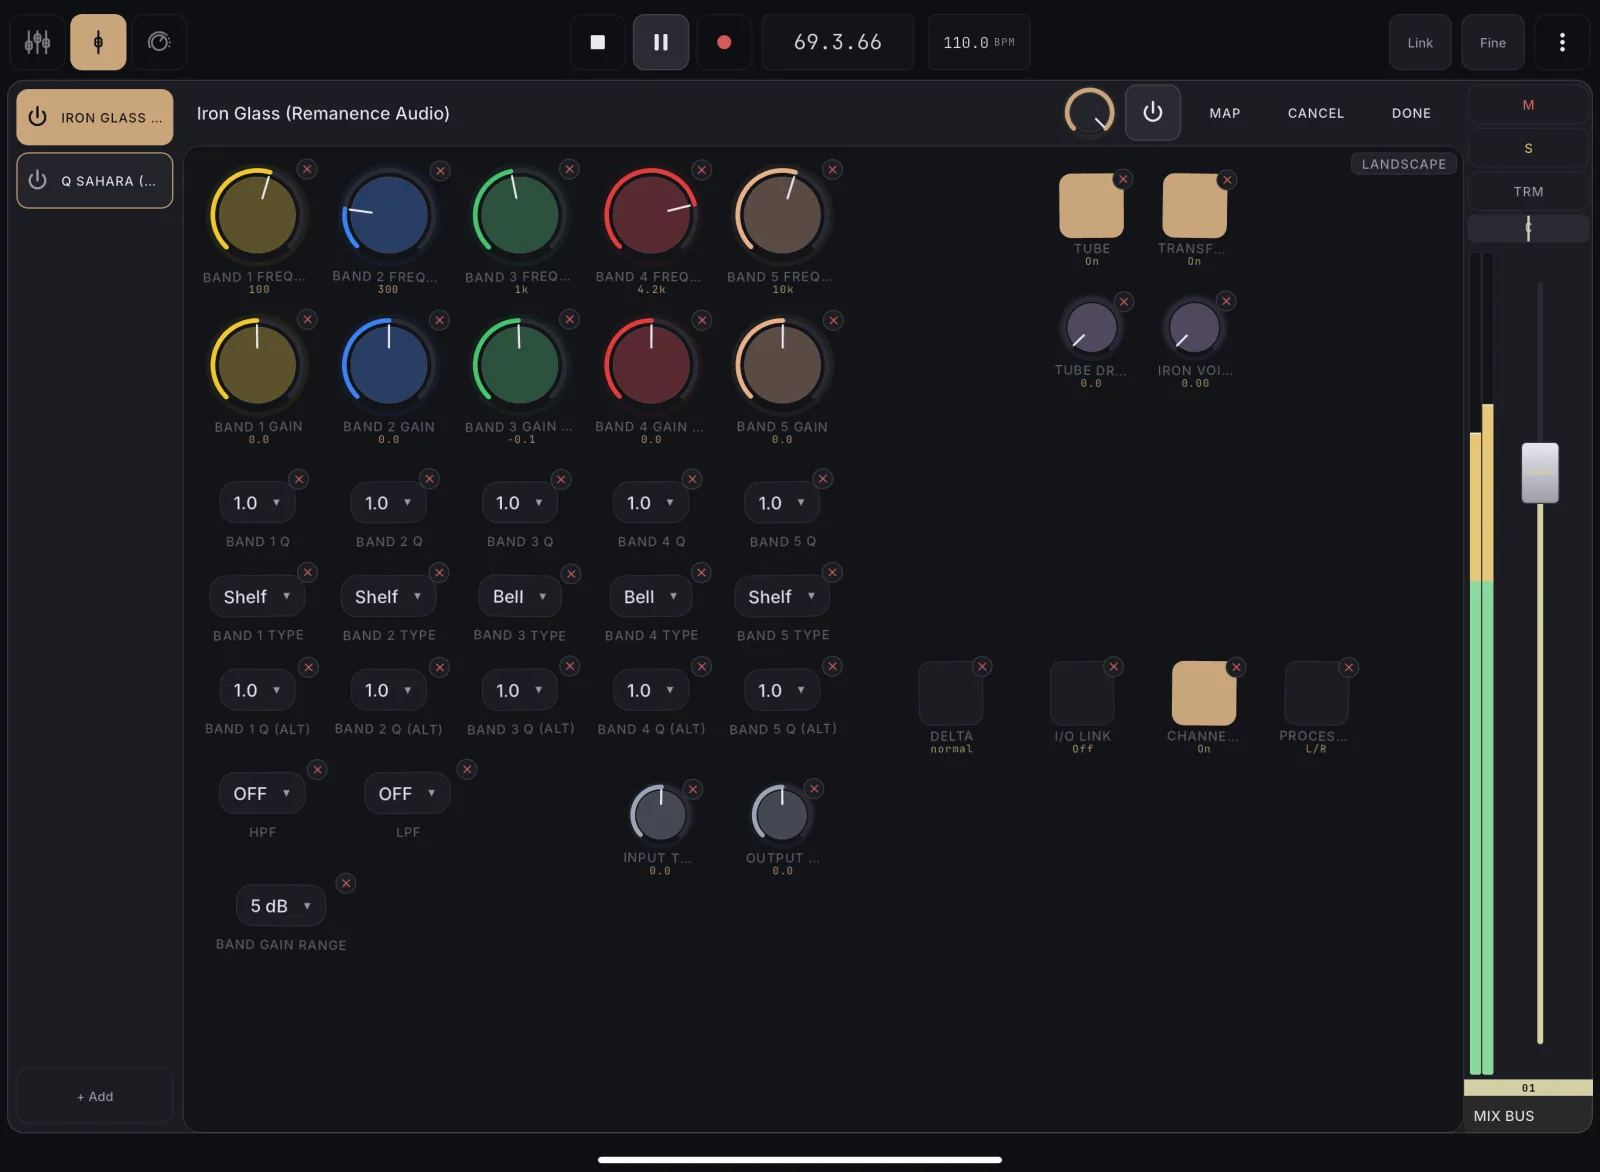
Build a custom control layout for a plugin#
UnlockDesign your own knob/button/dropdown layout for a plugin instead of relying on the auto-generated grid, ideal for plugins with dozens of parameters where you only care about a handful.
How to use
- Open the plugin in Channel Detail.
- If it has no saved layout yet, tap “Start mapping”. That drops you straight into listen mode: touch parameters in REAPER and each one lands on the canvas. Otherwise switch the mode dropdown to Template, then tap Edit.
- Tap an empty spot on the canvas to place controls another way (see “Add a control by touching a plugin parameter”).
- Drag to arrange, resize as needed.
- Tap Done to save, or Cancel to discard.
Tips
- Outgrown one screen? It splits into pages automatically, sized to your device (see “Spread a template across pages”).
- The layout is device-wide per plugin. It’s reused automatically wherever you use that plugin (see “Reuse a template on every instance”).
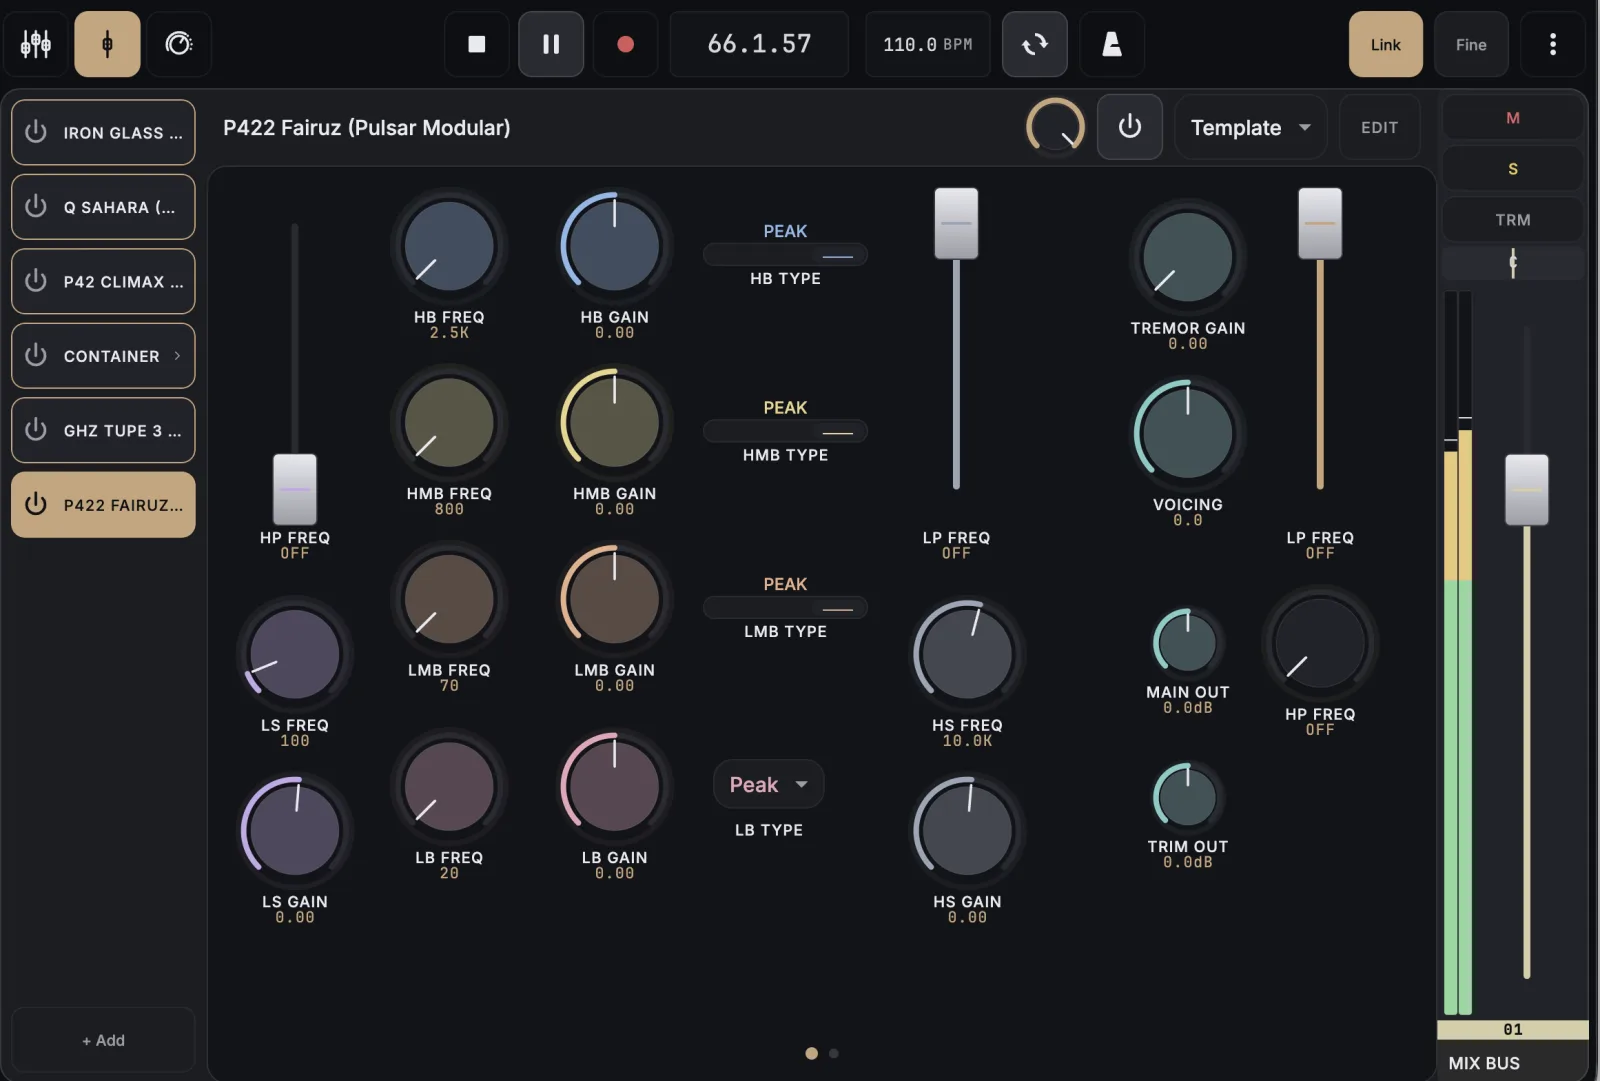
Reuse a template on every instance of a plugin#
UnlockYour saved template for a plugin automatically applies wherever you use that plugin. Design it once, reuse it on every track.
How to use
- Build and save a template for a plugin once.
- Add that same plugin to any other track or slot.
- Open it in Channel Detail. Your saved layout appears automatically, bound to the new instance.
Tips
- If a plugin update renames or reorders its parameters, a control that can no longer find its match shows greyed instead of silently binding to the wrong one. Rebind it to fix.
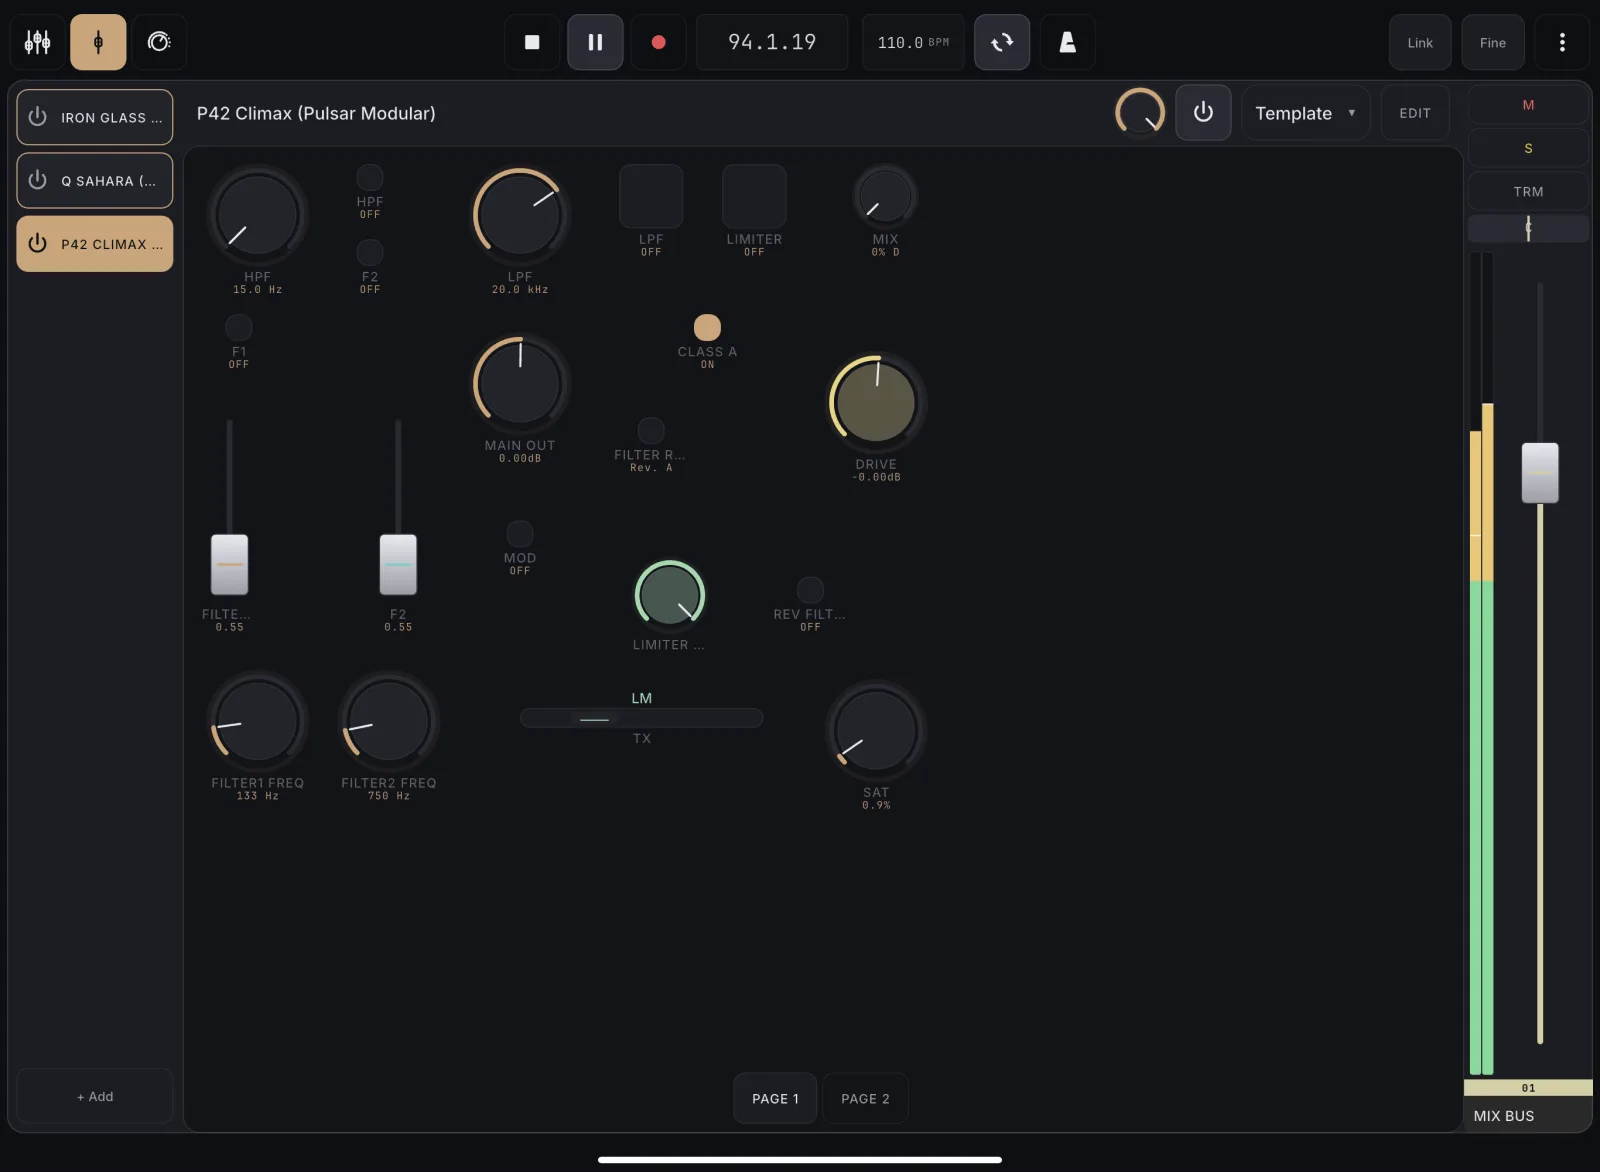
A template that outgrows one screen splits into pages automatically, sized to whatever device you're on. Swipe or tap through them while performing. Editing always shows page tabs.
How to use
- Build a template as normal; your controls live on one continuous layout.
- When it holds more than fits on your device’s screen, it splits into pages automatically. Swipe between them, or tap a page dot/tab. See “Choose dots or tabs for page navigation” for which one you get.
- To push a control onto another page, drag it to the screen edge and hold; the canvas flips mid-drag (see “Move a control to another page”).
Tips
- Pages are windows sized to the device you’re on, not saved files. Open the same template on a smaller iPad and it shows more pages; nothing is hidden or lost.
- Editing always shows page-number tabs, whichever style you’ve chosen for viewing.
- A control (or a resize that makes one bigger) stays on its current page whenever there’s room. It only spills onto the next page when the page is genuinely full.
Add a knob to your plugin template by touching the matching control on the plugin's own UI in REAPER, no hunting through a parameter list.
How to use
- While editing a plugin template, tap an empty spot on the canvas.
- Choose “From listen”.
- On your computer, touch/click the corresponding knob, fader, or switch on the plugin’s REAPER window.
- A bound knob appears on the canvas for each touch. Keep touching more controls to add more.
- Tap Done to finish.
Tips
- Only touches on THIS plugin instance are accepted. Touch a different plugin and the app says so rather than staying quiet, so a missed capture never looks like a dead listen mode.
- Touching a parameter that is already on the page is skipped, and the app tells you that too.
- Every capture lands as a knob, regardless of the REAPER control’s own widget type.
- Leaving edit mode with Done or Cancel also ends the listen session. Anything you captured before Done is saved with the template.
- “Start mapping” on a plugin with no layout yet drops you into this same listen session directly, so you can start touching parameters straight away.
- While a listen session is running, tapping a control on the canvas does not open its settings. Finish or cancel the session first.
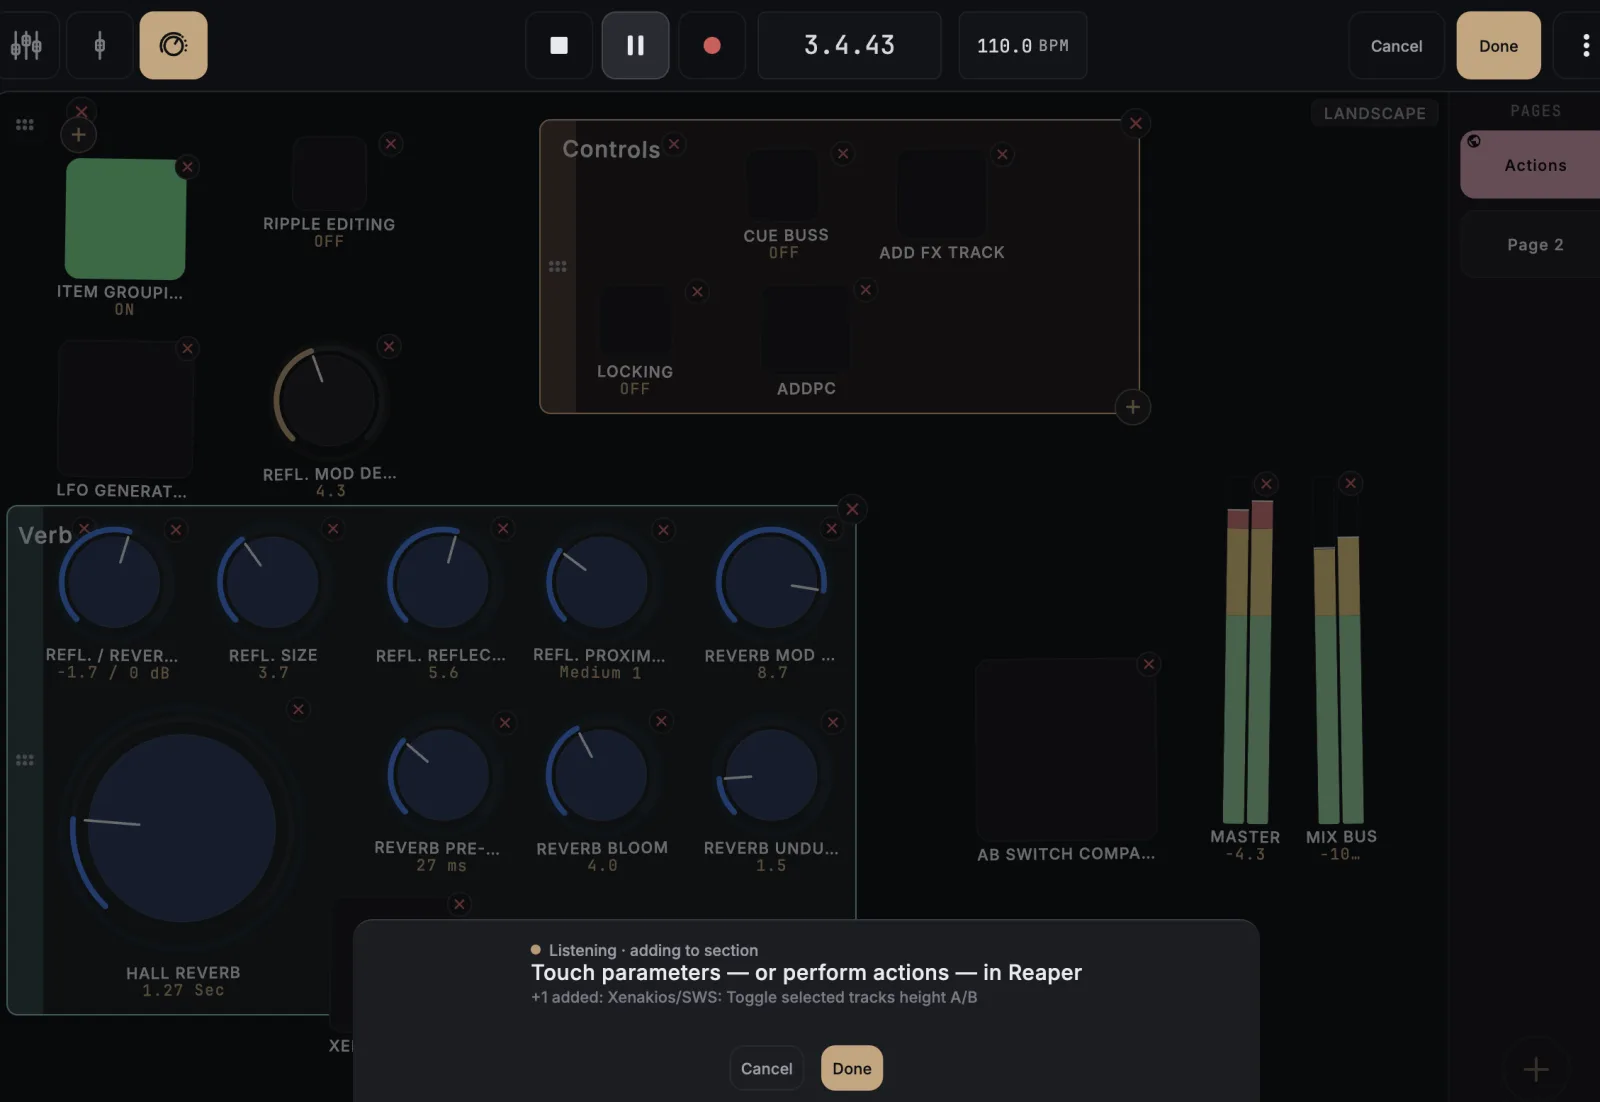
Re-point an existing template control at a different plugin parameter, handy after a plugin update shifts its parameter layout and a control stops matching.
How to use
- While editing, tap the control you want to fix.
- In its settings sheet, tap Rebind.
- Touch the new target parameter on the plugin in REAPER.
- Tap Add to confirm, or Cancel to back out.
Tips
- A control that no longer matches its saved parameter name shows greyed. That’s your cue to rebind it.
- Touching a different plugin during a rebind is refused, and the app tells you so instead of appearing to ignore you.
- Leaving edit mode with Done or Cancel ends the rebind session too.
Drop a gain-reduction meter into a template#
UnlockAdd a gain-reduction meter to a plugin template. It wires itself to the host compressor automatically, with no listen step required.
How to use
- While editing a plugin template, tap + Add on the canvas.
- Choose “GR Meter”.
- It appears already bound to the plugin you’re editing. Arrange and resize it like any other control.
- Tap Done to save.
Tips
- Only shows a live reading on compressors that report gain reduction to REAPER (most VST/VST3/AU compressors, JSFX compressors can’t be read this way).
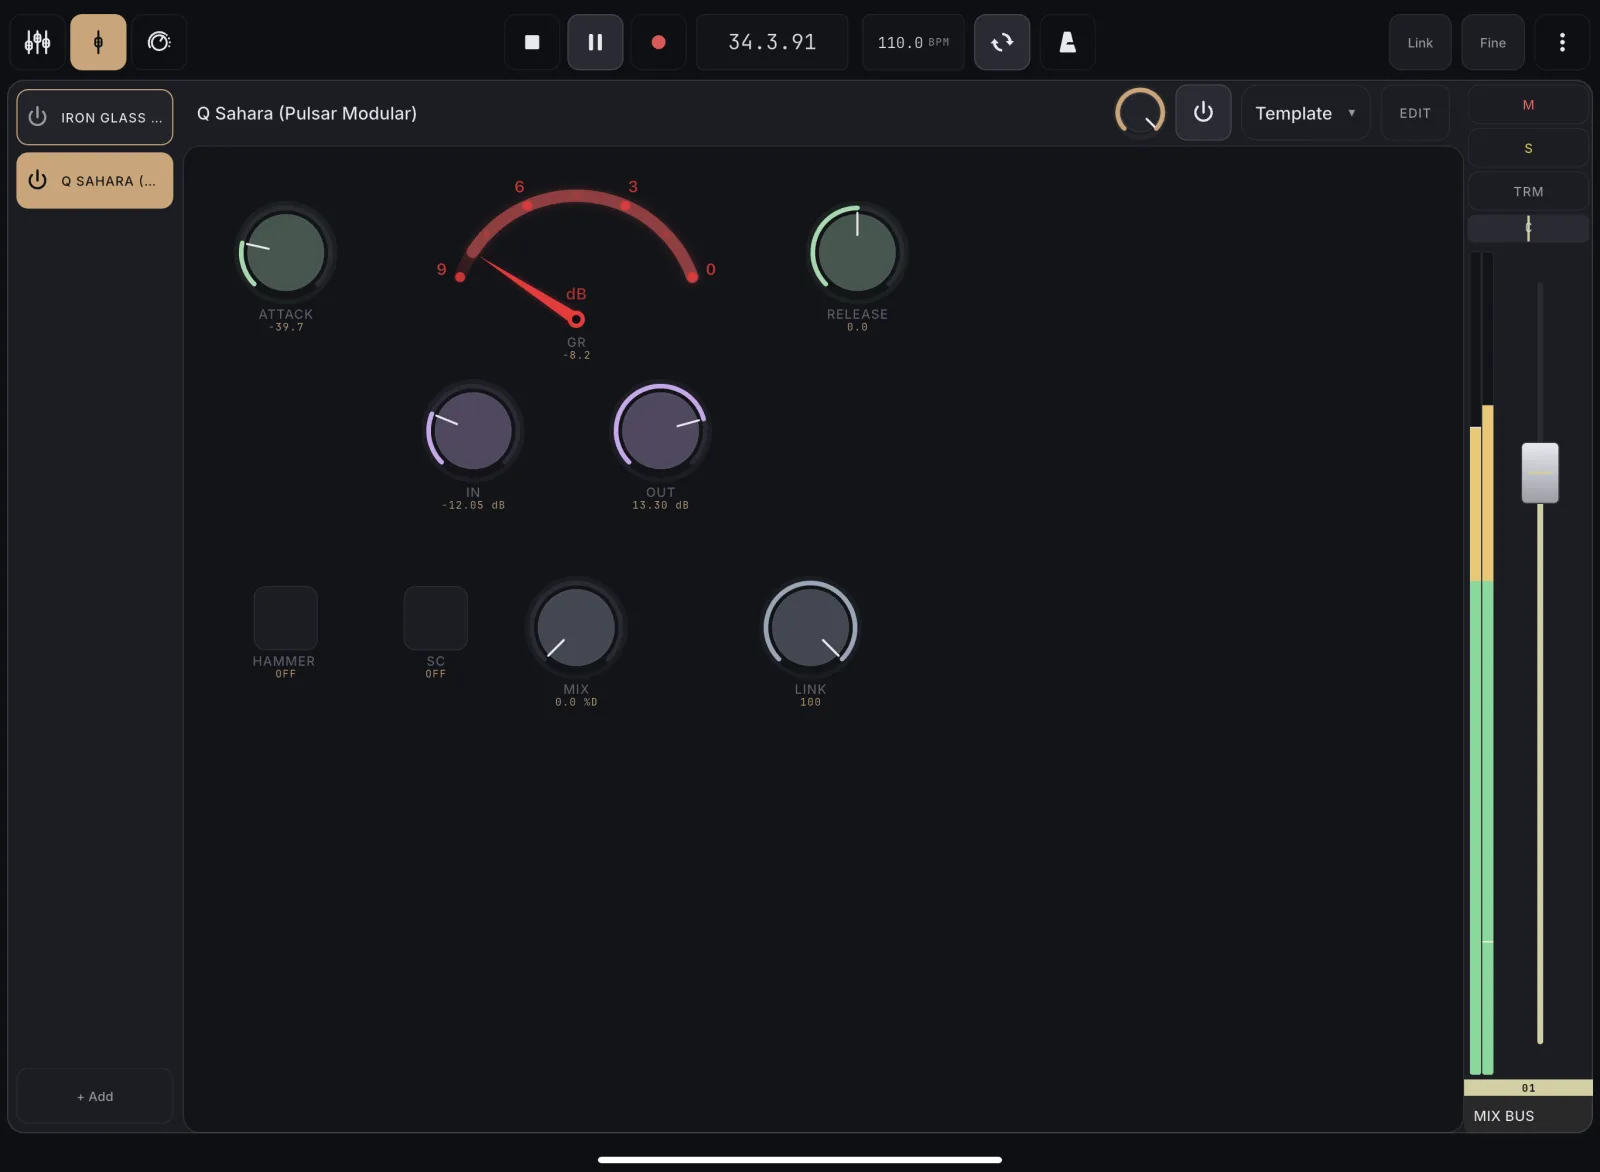
Flip the top of a track's Channel Detail between its FX chain and a mixer of its sends with one segmented toggle. The plugin list stays put, so you can jump back to a plugin any time.
How to use
- Open Channel Detail for a track.
- At the top of the FX chain rail, tap SENDS on the FX | SENDS toggle.
- The center swaps to a mixer of this track’s sends. Tap FX (or any plugin slot) to go back to the FX chain.
Tips
- The mode sticks when you change tracks: if you are looking at SENDS, the next track you open, step to, or follow from REAPER opens in SENDS too.
- The master bus has no SENDS view. Its toggle is hidden and it shows FX, but the next track still opens in SENDS.
Mix a track's sends in Channel Detail#
UnlockThe SENDS view turns a track's Channel Detail into a mini-mixer of every send it feeds, one strip per destination, each with a fader, pan, mute, routing, and a live level meter, footed in the destination track's own color.
How to use
- Open Channel Detail for a track and tap SENDS on the FX | SENDS toggle.
- Each of the track’s sends shows as a strip: drag the fader for send level, the pan bar for pan, tap mute, and cycle the routing button (POST / PREFX / PRE).
- Read each strip’s meter for the send’s live level; the colored footer names the destination it feeds.
Tips
- The strip meter is derived from the source track’s meter plus the send gain, so it reflects roughly what the destination receives without any extra metering setup.
- The track’s own fader stays on the right, unchanged, so you can balance the source and its sends side by side.
Add a new send from the track you're viewing to any other track. Pick the destination from the same track picker used everywhere, and the send lands silently at −inf ready to bring up.
How to use
- In a track’s SENDS view, tap the + card at the end of the row.
- Pick a destination track from the picker.
- The new send appears at −inf. Raise its fader to bring it up.
Tips
- The picker hides tracks you already send to (and the master and the track itself), so you can’t create a duplicate send by accident.
Delete a send you no longer need by long-pressing its destination footer in the SENDS view and confirming, a deliberate two-step so you never lose a routing by a stray tap.
How to use
- In a track’s SENDS view, long-press the colored destination footer at the bottom of the send strip you want to remove.
- Confirm Remove in the dialog.
- The strip disappears and the send is deleted in REAPER.
Tips
- Removing a send is permanent. To silence a send without deleting it, pull its fader to −inf or tap mute instead.
Flip the sends view to RECEIVES to see every send coming INTO the track you're on, one strip per source, so you can balance everything feeding a reverb, monitor, or bus from the bus's own page.
How to use
- Open Channel Detail for the destination track (a reverb, a monitor bus, a group) and tap SENDS on the FX | SENDS toggle.
- Tap RECEIVES on the SENDS | RECEIVES toggle at the right of the header. The header reads “RECEIVES” followed by the track name.
- Each source feeding this track shows as a strip, footed in that source’s color: drag the fader for its send level, the pan bar for pan, tap mute, and cycle the routing button.
- Use a strip’s automation button to set that source track’s automation mode, so its send rides get written in Touch, Latch, or Write.
Tips
- A receive is just a send seen from the other end, so every move here changes the same send you’d find on the source track’s own SENDS view.
- To stop a source feeding this track, long-press its colored footer and confirm Remove.
- The master bus has no RECEIVES view. Tracks reach it through their main output, not a send.
Wire a new send INTO the track you're on. Pick the source from the same track picker used everywhere, and it lands silently at −inf, ready to bring up from the bus's own page.
How to use
- In a track’s RECEIVES view, tap the + card at the end of the row.
- Pick the source track you want to feed into this one.
- The new receive appears at −inf. Raise its fader to bring the source up.
Tips
- The picker hides tracks that already send here (and the master and the track itself), so you can’t create a duplicate by accident.
- This is the mirror of adding a send: it creates a send from the source into this track, so it also shows up on the source track’s own SENDS view.