
Mixer
Console strips, layers, banking, transport, automation, and metering.
Guides: Set a track's input from your iPad or Android tablet · Give every band member their own monitor mix · Pin the master or any track to the edge of the mixer · Show only the tracks that are visible in REAPER's mixer · Jump between markers and regions, and queue the next song · Ride faders smoothly on a phone or tablet · Use MixSurface as a layer switcher for a hardware controller · Make fine adjustments with Fine mode and focus zoom · Ride a reverb or bus send from every fader with Sends on Fader · Faders ignore automation or won't snap back in Touch · Ride your sends
Set a track's level with a vertical drag on its fader cap, the core mixing gesture, tuned with an analog-console dB taper so the top half of travel gives fine control near unity.
How to use
- Touch the fader cap in the channel strip’s fader lane.
- Drag up to raise level, down to lower it. A live dB readout appears while you drag.
- Release to set.
Tips
- Turn on “Show Fader dB” in the Mixer strip layout menu to keep that level printed under every strip, not only while you are dragging.
- Turn on FINE (top bar) for slower, more precise moves across the whole drag.
- The taper reserves position 0.75 for exactly 0 dB (unity) so it’s easy to land back on unity by feel.
- Drag all the way to the bottom of the lane to reach silence. The readout counts down past -60 dB and lands on -∞ at the very end of the travel.
- The fader tops out at +12 dB. If a track is already louder than that (set in REAPER, by an envelope, or by a script), touching the fader drops it to +12 dB, so MixSurface warns you before it happens.
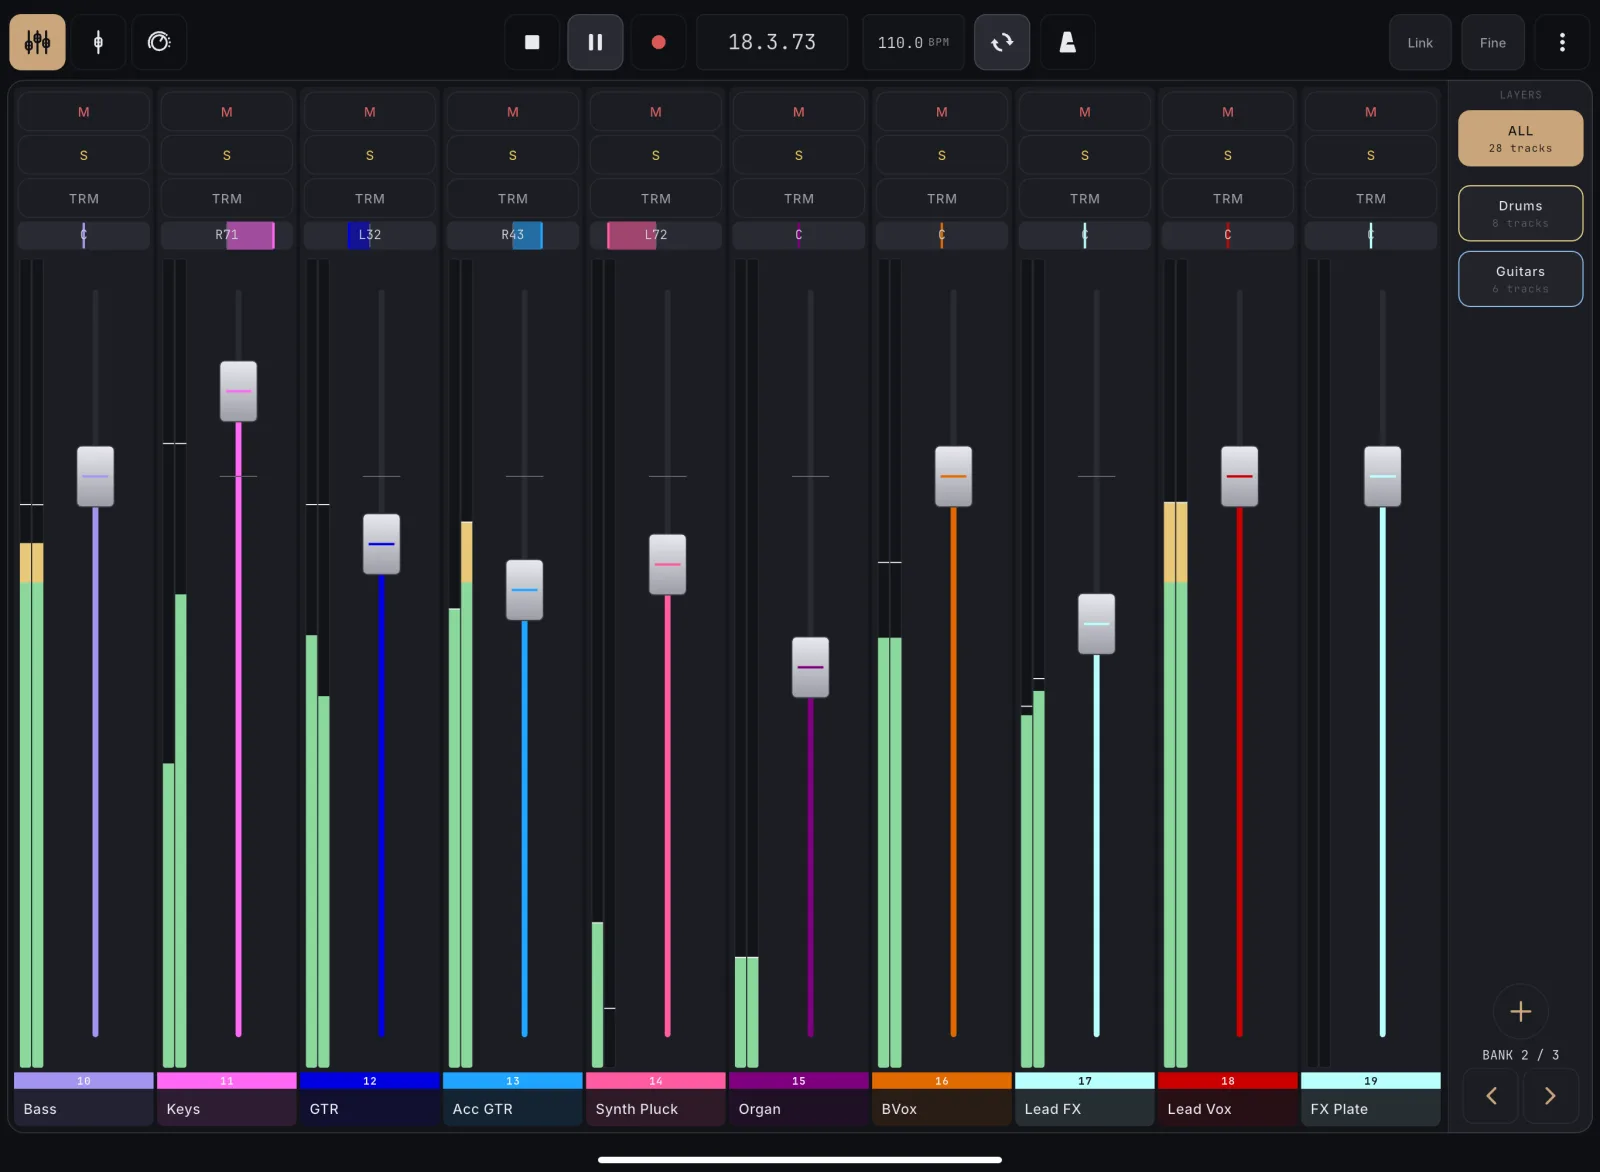
Position a track left/right in the stereo field with a horizontal drag on the strip's pan bar, the readout (C, L23, R45) renders inside the bar as you move.
How to use
- Touch the horizontal pan bar above the fader.
- Drag left or right. The fill grows from center and the readout updates live.
- Release to set.
One tap on a channel's name plate selects that track in REAPER, so you can pick the channel you want to work on from the iPad without reaching for the mouse.
How to use
- Tap the colored name button at the bottom of any channel strip.
- That track becomes the selection in REAPER, and its strip deepens to its selected shade on every connected device.
Tips
- Selection is instant. It is not held back waiting to see whether you are about to double-tap.
- Double-tap the same name button to open Channel Detail for that track.
- Press and hold it instead to open Track Setup.
- A tap always selects that track alone. If several tracks were selected, tapping one of them narrows the selection down to it.
- To select several at once, drag sideways across the name buttons instead.
Press a channel's name plate and slide sideways to select every strip you pass, so you can grab a whole group of tracks and move their faders together.
How to use
- Put your finger on the coloured name button at the bottom of any channel strip.
- Slide sideways across the strips you want. Each one deepens as you pass it.
- Lift. All of those tracks are now selected in REAPER.
Tips
- Drag in either direction. The range runs from where you started to wherever you lift.
- Nothing is sent until you lift, so you can sweep back and forth to adjust the range before committing.
- Move one fader in a range and REAPER moves the rest with it. Mute, solo, record-arm, polarity and input monitoring follow the selection too, and so does the record input: tap the input cell on any selected strip and the sheet covers the whole range, sequentially if you ask it to.
- A quick tap still selects that one track on its own, and a press-and-hold still opens Track Setup. Only a sideways slide paints a range.
- Sliding past the last strip stops there; it does not page the mixer across to the next bank.
Double-tap a channel's name plate (the scribble strip) to jump straight into that track's FX chain and plugin workspace, and double-tap it again to go back where you came from.
How to use
- Double-tap the colored name button at the bottom of any channel strip (shows channel number, REAPER track color, and name). Channel Detail opens for that track.
- To go back, double-tap the same track’s name button in Channel Detail. You land on the screen you came from, the Mixer or the arrange.
Tips
- Going back works once per trip. If you reached Channel Detail another way, from its tab or after switching screens, the double-tap there does nothing.
- A single tap on the same button just selects the track in REAPER without leaving the mixer. The first tap of your double-tap does that too, which is harmless.
- Channel Detail (and its EQ surface) is a paid feature. The mixer strip and this navigation gesture are free, but the destination screen is behind the unlock.
Instantly snap a track's level back to 0 dB without hunting for the exact drag position.
How to use
- Double-tap the fader cap to snap it back to 0 dB.
- Double-tap the pan bar the same way to recenter it.
Tips
- Both resets glide smoothly into position rather than snapping instantly, see ‘Watch a fader glide smoothly when it’s moved for you’.
Switch a track, or every selected track, between Trim, Read, Touch, Write, Latch and Latch Preview right from the strip so you can drop into writing automation without opening REAPER.
How to use
- Tap the colored AUTO badge below Solo (labelled TRM/READ/TCH/WRT/LAT/LATP).
- A menu opens with all six modes, the current one highlighted: TRM, READ, TCH, WRT, LAT and LATP.
- Tap the mode you want. Tap outside the menu to close it without changing anything.
Tips
- Select a range of strips first and one pick moves all of them, the way mute, solo and record-arm already do.
- LATP is Latch Preview. You ride the fader and hear the change without committing it, then commit it with the write button that appears in the top bar beside Auto.
- The badge color and label always reflect REAPER’s live automation mode for that track, including changes made inside REAPER itself.
- While a global automation override is active it wins over every track, so every badge shows the override’s mode and tapping one opens no menu, it just tells you why. Clear the override from the Auto button in the top bar to get per-track control back.
Force every track into one automation mode at once, or clear the override, from the Auto button in the top bar. It mirrors REAPER's own Global automation override, so whatever you set in either place shows up in the other.
How to use
- Find the Auto button in the top bar, just to the right of the transport controls. It reads just “Auto” when no override is active.
- Tap it and pick a mode. The list is REAPER’s own, in REAPER’s order: No override and Bypass all automation at the top, then All tracks: Trim/Read, All tracks: Read, Touch, Latch, Latch Preview and Write (each reads “All tracks: …”).
- The button always reads “Auto” and lights up in the mode’s colour. The full name, for example “Auto: Touch”, is in the picker, in the More menu when the button has folded there, and in what a screen reader announces.
- To go back to per-track modes, tap it again and choose No override.
Tips
- While an override is active it wins over every track’s own AUTO badge, so the badges show the overridden mode. That is what REAPER is actually doing.
- Setting the override to Latch Preview puts every track in preview: ride the faders, hear the change, and nothing is written until you commit it with the save button that appears in the top bar.
- Bypass is not a mode: it switches automation off entirely, so every strip reads TRM until you clear it.
- While an override is engaged the Auto button stays in the bar even on an iPad mini; only on a phone does it move into the More menu, where its row names the mode.
- Setting the override in REAPER’s Options menu updates the button within a moment, and every fader and pan refreshes to match.
Any channel strip that is reading or writing automation outlines itself in that mode's colour, so one look across the mixer tells you which tracks are armed to move. Resting tracks stay borderless.
How to use
- Put a track into Read, Touch, Latch, Latch Preview or Write, from its AUTO button or from REAPER.
- That strip outlines itself in the mode’s colour: green for Read, yellow for Touch, purple for Latch, blue for Latch Preview, red for Write.
- Tracks sitting in Trim stay borderless, so the only strips wearing a ring are the ones that will actually move.
Tips
- The colours are REAPER’s own, so a strip outlined in yellow here is the same yellow you see on that track’s automation button in REAPER.
- Setting a global automation override outlines every strip at once, because the override really does put every track into that mode.
- The border reflects the same mode the AUTO badge shows, so it keeps working if you hide the AUTO row from the mixer’s three dot menu to save space.
Ride a fader in Latch Preview to hear the change without writing it, then tap the write button that appears in the top bar to commit those values to the time selection.
How to use
- Tap a track’s AUTO badge until it reads LATP (Latch Preview).
- Make a time selection in REAPER covering the part you want to write.
- Press play and ride the fader or pan. You hear the change, but nothing is written yet.
- Tap the write button that has appeared in the top bar, just before the More (⋮) button. Your previewed values are written to the time selection.
Tips
- The button only exists while at least one track is in Latch Preview. If it is not there, no track is previewing and there would be nothing to write.
- It commits every envelope that is actively writing, not just the track you last touched, so you can preview several tracks together and commit them in one tap.
- It stays in the bar together with Auto. On a phone it folds into the More menu, where it reads “Write automation to time selection”.
Watch the fader and pan follow live automation#
FreeIn Read mode (or any mode with an active envelope), the fader and the pan bar physically move to show the automated value in real time, not just the track's trim level, so you always see what's actually playing.
How to use
- Set a track’s automation mode to Read (or Touch/Write/Latch with an existing envelope).
- Press play. The fader rides the volume envelope, and the pan bar rides the pan envelope, as playback passes over automated points.
Tips
- A global automation override counts too: with the override set to Read or Touch, every track follows its envelopes even if its own badge said Trim.
Write automation by grabbing the fader (Touch/Latch)#
FreeGrab the fader or pan control while in Touch or Latch mode and your move gets recorded straight into REAPER's automation. Release cleanly and playback stays put.
How to use
- Tap the track’s AUTO badge and pick Touch (TCH) or Latch (LAT) from the menu.
- Press play, then grab the fader (or pan bar) at the point you want to start writing.
- Move it live. REAPER records the automation as you drag.
- Lift your finger to release; the control lets go and (in Touch) hands back control to the existing curve.
Build a custom fader layer#
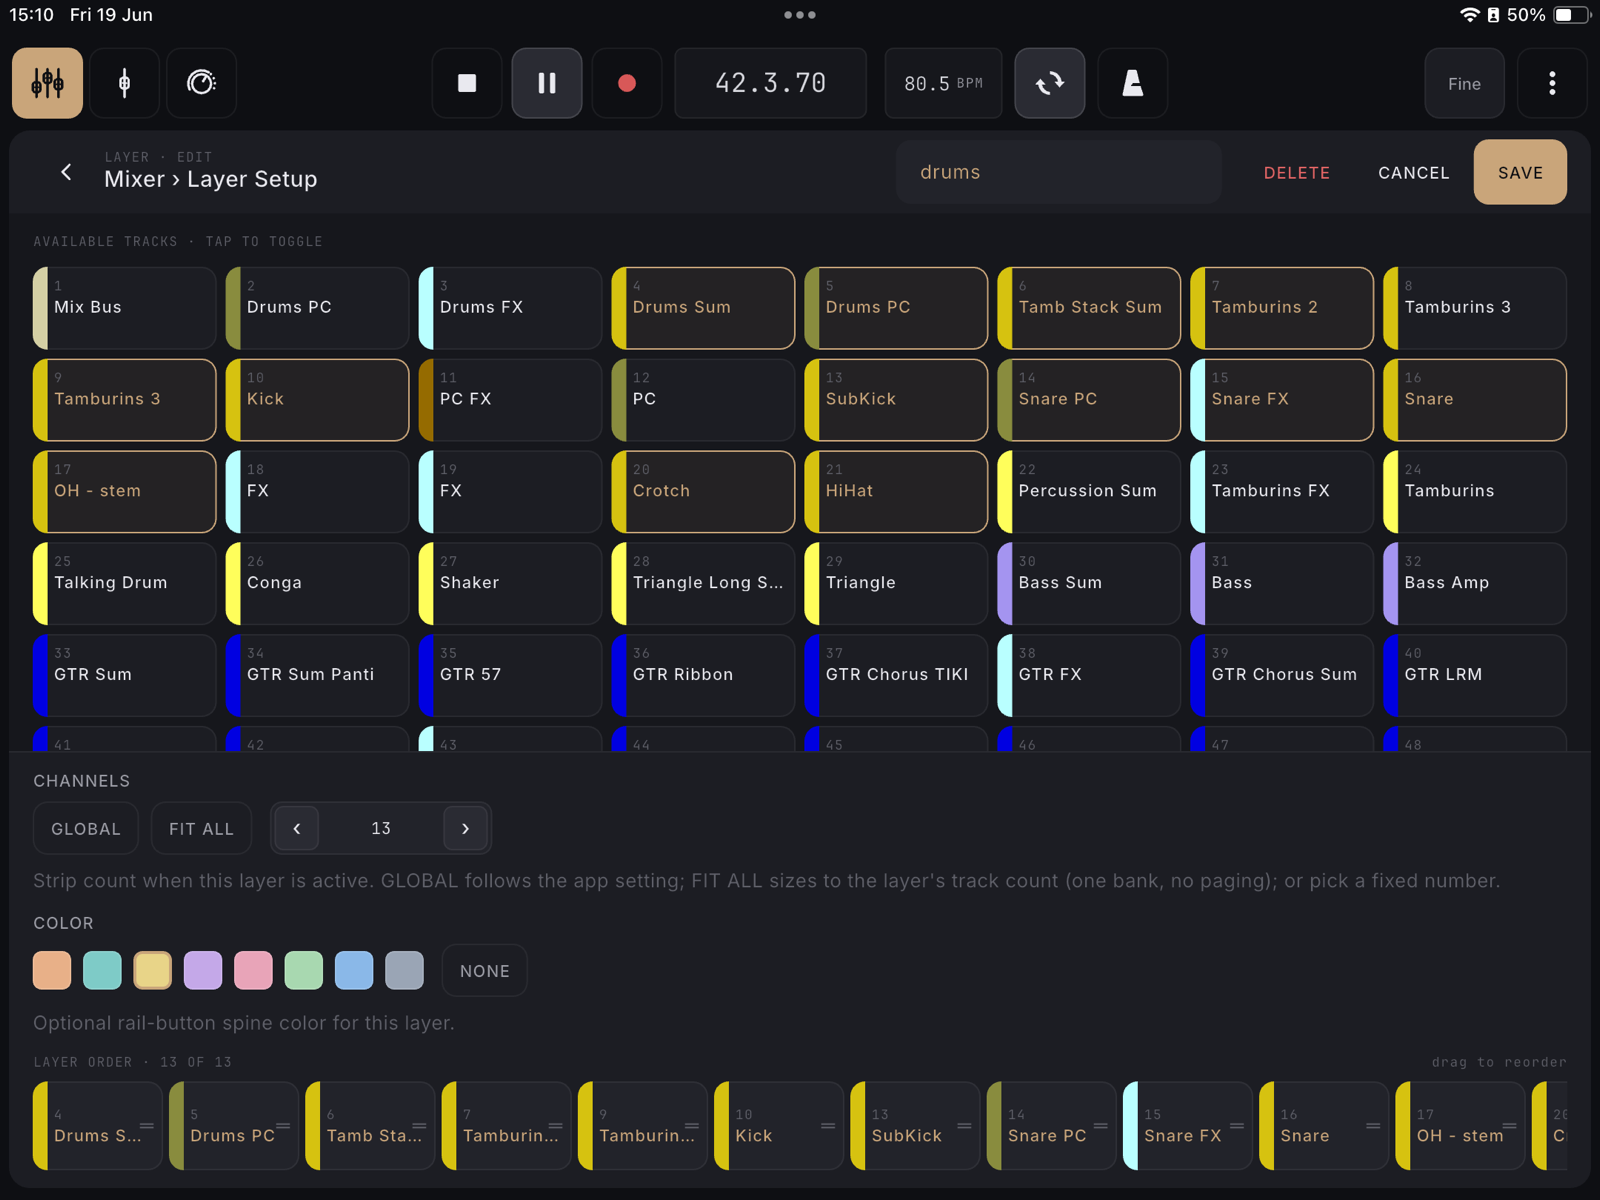
FreeGroup any subset of tracks (a drum bus, your vocal chain, a monitor mix) into a named, reorderable layer so you only see the channels you care about at that moment.
How to use
- Tap “+ Add layer” in the layer rail.
- Type a name for the layer.
- Tap tracks in the grid to include them (tap again to remove).
- Optionally pick an accent color and a channel-count mode (see related cards).
- Tap Save.
On a big session you have already hidden the channels you never touch in REAPER's own mixer. Point the ALL layer at that same choice and the tablet stops showing the other hundred and thirty.
How to use
- Go to the Mixer and tap Visible in the top bar. On a narrow window it is one of the first controls to move into the overflow (⋮) menu, where it keeps the same label.
- Choose Follow REAPER’s mixer. The chip now reads “Visible: REAPER”.
- The ALL layer shows only the tracks REAPER shows. Hide or show a track in REAPER’s mixer and the tablet catches up within about half a second.
Tips
- The ALL chip in the layer rail reads something like
13/150 trackswhile tracks are being withheld. If it just says150 tracks, nothing is hidden. - Your own layers are never filtered. They are your curation, so they always show exactly the tracks you put in them.
- The master strip always stays, even if REAPER’s mixer is hiding it.
- This mode never changes anything in REAPER. It only reads.
- If you hide everything in REAPER, the mixer says so rather than going blank.
Turn a layer tap into a view change on the computer as well: pick your drums layer on the tablet and REAPER's mixer narrows to the same channels, so the engineer at the desk sees what you see.
How to use
- Go to the Mixer and tap Visible in the top bar. On a narrow window it is one of the first controls to move into the overflow (⋮) menu, where it keeps the same label.
- Choose Drive REAPER’s mixer. The chip now reads “Visible: Surface”.
- Tap any layer in the rail. REAPER’s mixer narrows to that layer’s tracks.
- Tap ALL to put every track back in REAPER’s mixer.
Tips
- Tap the layer you are already on to push it again, which is how you force REAPER back into agreement if someone changed it at the desk.
- Nothing is written until you tap a layer. Launching the app, reconnecting, waking the tablet, or deleting a layer never changes REAPER’s mixer.
- Each push lands as a single undo step in REAPER, named “Set mixer visibility”. One Ctrl+Z at the computer puts the old view back.
- Selecting ALL means all: it shows every track in REAPER again, including any you had hidden by hand. In this mode layers are how you curate.
- REAPER’s arrange window is left alone. Only the mixer changes.
- If someone adds or deletes tracks at the computer, the next tap is refused rather than applied to the wrong list. The app refreshes and says to try again.
- Two tablets both driving REAPER will fight, and the last tap wins. One drives, the others watch.
Keep master, a vocal bus or any track you always need in a fixed zone at the mixer's edge, on every layer, while the other strips bank and scroll.
How to use
- Long-press a strip’s name to open Track Setup, or open Layer Setup from the rail.
- Tap the pin next to the track you want to keep in view. Master has its own slim row at the top of Track Setup (or its card in Layer Setup); tap its pin the same way.
- The track moves into a fixed zone at the edge of the mixer and stays there on every layer.
- Tap the pin again to unpin it.
Tips
- The zone sits on the same side as master in REAPER’s mixer. Flip “Show master track on right side” in REAPER and the zone follows.
- Pins belong to the project, so every iPad on the same project sees them.
- With many pins on a small screen the zone scrolls on its own instead of squeezing the other strips.
- In Sends on Fader, a pinned master slot shows the send destination’s return, just like the normal master slot.
Fold a folder track's children away so a big session fits, and keep that in step with REAPER's own mixer when the visibility link is on.
How to use
- Find a folder track. Its name bar has a small chevron on the right.
- Tap the chevron to hide the folder’s children. Tap it again to show them.
- Tracks inside a folder carry a thin bar in the folder’s colour, so you can see what belongs together.
Tips
- With Visible set to follow REAPER or drive REAPER, folding here folds the folder in REAPER’s mixer too, and folding in REAPER shows up here within about half a second while REAPER’s mixer is open. A fold done by an action while the mixer is closed shows when the mixer next opens or at the next track change.
- With the visibility link off, folding only affects this iPad and is forgotten when you open another project.
- Folding works the same on every layer. If one of your layers holds a folder’s tracks but not the folder itself, those tracks stay visible.
- A pinned track stays in the pinned zone even if its folder is folded.
Drag a track's tile in the layer editor's order dock to change the left-to-right position it renders in on that layer, independent of REAPER's own track order.
How to use
- In the layer editor, find the “Layer order” dock at the bottom.
- Drag a track tile to a new position.
Color-code a layer#
FreeGive a layer an accent color so its rail button (and spine) stands out at a glance, handy once you have several layers stacked up.
How to use
- In the layer editor, tap a swatch in the Color row.
- Save the layer.
Tips
- The first swatch is the empty one, crossed by a diagonal line. Pick it to leave the layer with no color at all, so its rail button shows no spine.
- It is the same palette you color tracks and controls from, so a layer can carry the color of the tracks on it.
- On a short screen (a small tablet in landscape) the Color section opens folded up, so the track grid above keeps its rows. Tap the COLOR label to open it; it stays open until you leave the screen.
Set a layer's own strip count#
FreeOverride how many channel strips render when a specific layer is active, follow the global setting, auto-fit the layer's exact track count onto one bank, or lock a fixed number (2–40).
How to use
- In the layer editor, under “Channels”, pick GLOBAL (follow the app-wide setting), FIT ALL (exactly as many strips as this layer has tracks, no banking), or step a fixed count from 2 to 40.
Tips
- On a short screen (a small tablet in landscape) the Channels section opens folded up, so the track grid above keeps its rows. Tap the CHANNELS label to open it; it stays open until you leave the screen.
Jump between your saved layers (or the pinned ALL view) with a single tap on the side/bottom rail, the fastest way to change what's on screen mid-session.
How to use
- Tap any layer button in the rail (ALL is pinned first, then your custom layers).
- The strip row immediately shows that layer’s tracks, banked per its channel-count mode.
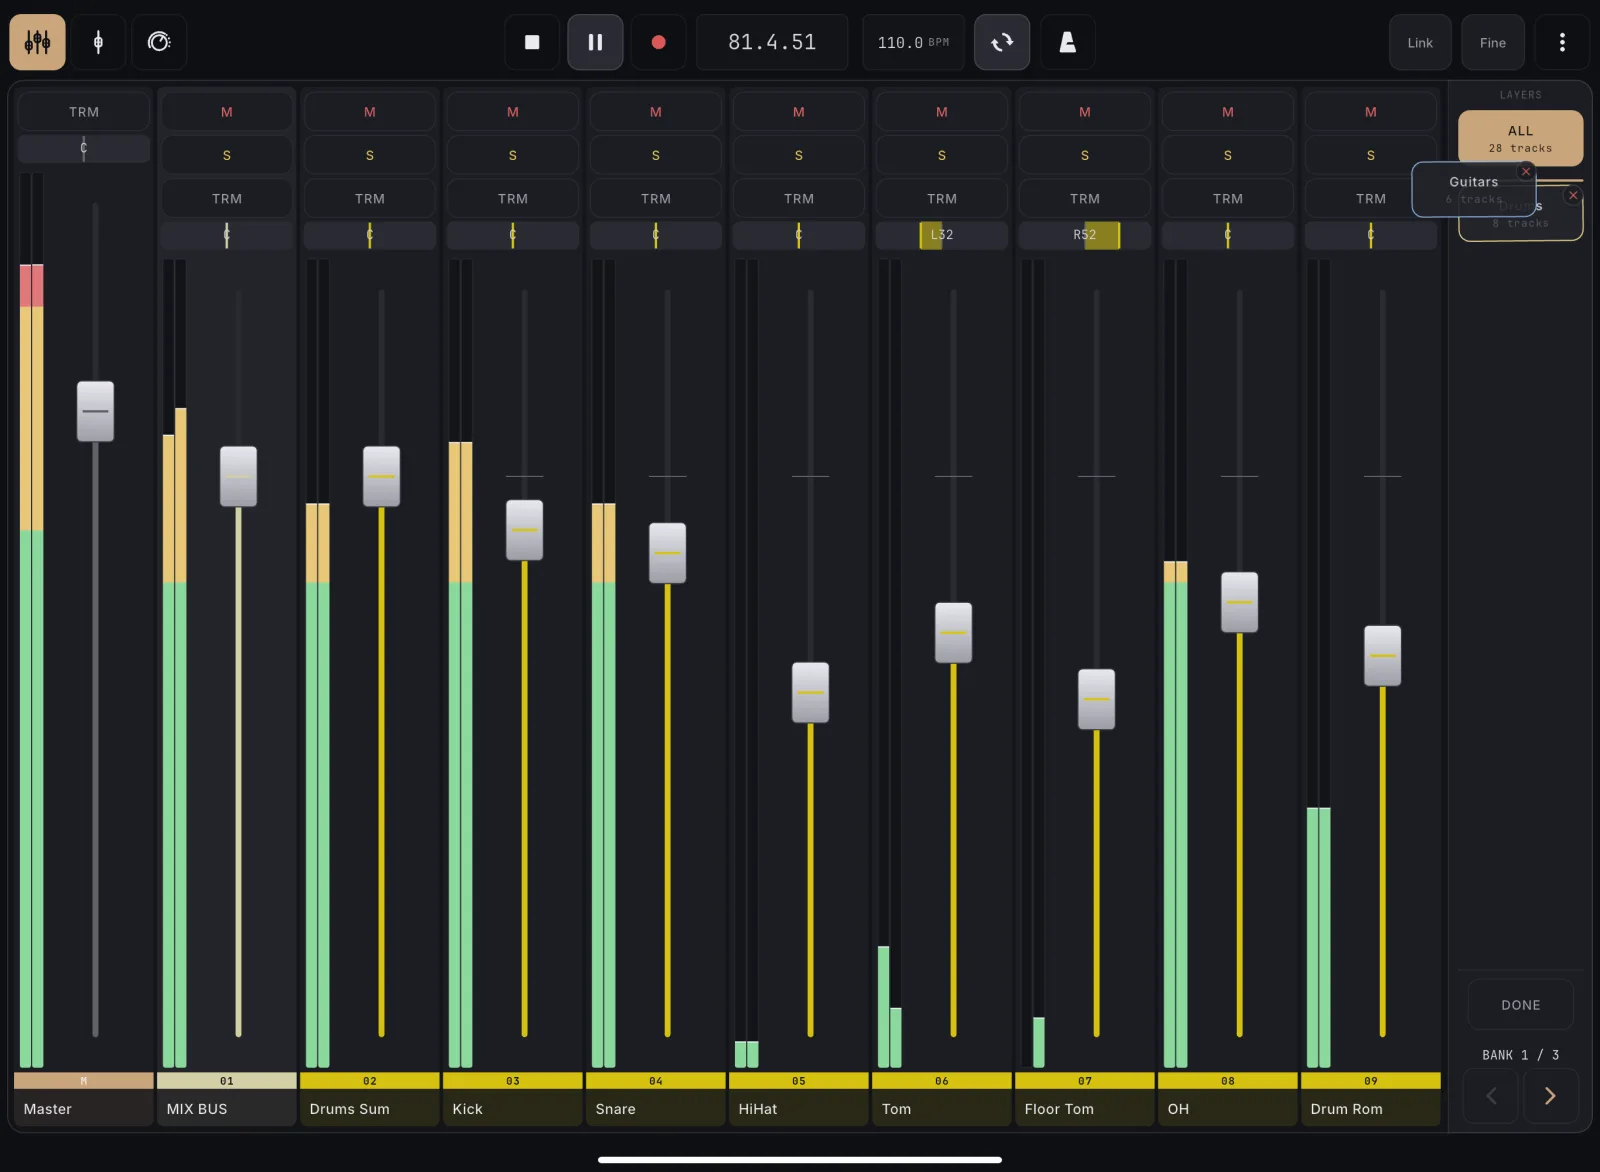
Long-hold any custom layer in the rail to enter an edit mode where you can open it for editing, drag it to a new position, or delete it, without leaving the mixer.
How to use
- Long-press any user layer button in the rail. The list starts wiggling with a Done bar and ✕ delete badges.
- Tap a layer to open its edit screen, drag a layer to reorder it, or tap its ✕ to delete (with confirmation).
- Tap Done to exit edit mode.
Tips
- The pinned ALL layer is never editable, reorderable, or deletable. It’s a fixed entry point.
Page through track banks with the chevrons#
FreeWhen a layer has more tracks than fit on screen, step through them a bank at a time with the rail's chevron pager instead of scrolling.
How to use
- When a layer overflows one screen, a “BANK 1 / N” pager with ◄ ► chevrons appears at the end of the rail.
- Tap the right chevron to advance a bank, left to go back.
Tips
- Each layer remembers its own last-viewed bank when you switch away and back.
The selected track comes into view#
FreePick a track anywhere, in REAPER, the arrange or another screen, and the Mixer pages to it and the Track Setup list scrolls to it, so you never hunt for the channel you just selected.
How to use
- Select a track anywhere: click it in REAPER, tap it in the arrange, or step to it in Channel Detail.
- In the Mixer, the bank flips to the one that holds that track.
- In Track Setup, the list scrolls just far enough to show that track’s row.
Tips
- Nothing moves if the track is already on screen, pinned, or not part of the current layer.
- It only follows a new selection. Page or scroll away by hand and the view stays where you put it until the selection changes again.
Play, stop, and record from the top bar#
FreeControl REAPER's transport from anywhere in the app. The play/stop/record cluster sits dead-center in the top bar on every tab.
How to use
- Tap Stop to stop.
- Tap Play to play (the icon becomes Pause while playing; tap to pause).
- Tap Record to arm and start recording.
Tips
- The cluster tells you what REAPER is doing at a glance: the button fills in when playing, and fills red while recording. Stop stays quietly lit when the transport is parked.
- If the icons look dimmed, MixSurface has not heard from REAPER yet. That is different from “stopped”, so nothing lights up until the real state arrives.
Switch REAPER's global record mode between normal, time selection auto-punch, and auto-punch selected items, the same three choices as right-clicking Record in REAPER.
How to use
- Press and hold the Record button in the top bar until the menu opens.
- Pick a mode: normal, time selection auto-punch, or auto-punch selected items. The current mode has a tick.
- Tap Record as usual. A quick tap always records straight away; only a hold opens the menu.
Tips
- Record shows the mode the way REAPER does: a ring for normal, circular arrows for time selection auto-punch, a rectangle for auto-punch selected items. A punch left on from an earlier session is visible before you start a take.
- Changing the mode in REAPER updates the tick and the mark here too.
Jump to the previous or next marker with a tap, or scrub continuously by holding, using the rewind/fast-forward buttons in the top bar.
How to use
- Tap the rewind or fast-forward icon (left of Stop) for a quick jump to the previous or next marker.
- Press and hold either icon for a moment (about 0.4 seconds) to start scrubbing continuously.
- Keep holding to keep scrubbing. Lift your finger to stop.
Tips
- A held scrub keeps going as long as you hold, so lift as soon as the playhead reaches where you want.
- At narrow phone widths, these two buttons are the first thing to make way for the rest of the top bar.
Tap in a tempo#
FreeSet REAPER's project BPM by tapping along to a beat, right from an explicit TAP button, no risk of a stray touch on the readout changing your tempo.
How to use
- Tap the BPM readout in the top bar to open its popover.
- Tap the TAP button in time with the beat you want; the BPM readout updates live as you tap.
Toggle loop (cycle) playback#
FreeTurn REAPER's loop/cycle playback on or off from the top bar, with the button lighting up to reflect REAPER's own loop state.
How to use
- Tap the loop icon in the top bar (folds into the kebab under width pressure, or hides entirely while editing a Control View page).
Tips
- A dimmed icon means MixSurface has not heard REAPER’s loop state yet, which is not the same as loop being off. It brightens as soon as the state arrives.
Toggle the metronome (click)#
FreeSwitch REAPER's metronome click on or off from the top bar, lit when active.
How to use
- Tap the metronome icon in the top bar (folds into the kebab first under width pressure, ahead of any other toolbar item).
Read the inline stereo meter#
FreeA thin L/R peak meter built into each fader lane gives an at-a-glance level check without needing a separate meter bridge.
How to use
- Look at the narrow bars to the left of each fader. Left and right channel peaks update live as audio plays.
Set the global strips-per-bank#
FreeDecide device-wide how many channel strips show per bank, auto-FIT them to the screen width, or lock a fixed count (e.g. 10 to mirror a hardware console) for every layer that doesn't override it.
How to use
- Open Settings from the top-bar kebab and tap Mixer.
- Under “Channels per layer”, tap FIT for automatic width-based sizing, or step to a fixed number (2–40).
Tips
- Any individual layer can still override this with its own Channels setting.
Tap the transport's timecode box to flip between Time, Bars (beats), and SMPTE display. Pick whatever format you think in.
How to use
- Tap the timecode readout in the top-bar transport cluster.
- Choose Time, Bars, or SMPTE from the popover.
Tips
- Your choice is remembered across app restarts.
Choose how Solo behaves (Follow REAPER, In Place, or Normal)#
FreeLet Solo do whatever REAPER itself does (the default), or force it to keep the track's sends/routing active or to isolate it outright, a global preference that shapes every solo press.
How to use
- Open Settings from the top-bar kebab and tap Mixer.
- Under “Solo mode”, choose one:
- Follow REAPER (default) solos the way REAPER itself is set to, so the Solo button matches the one in your own mixer.
- In place always keeps the soloed track routed through its sends.
- Normal always isolates the track, ignoring routing.
Notes
- The two overrides ignore REAPER’s preference on purpose. Pick one only if you want MixSurface to solo differently from your mixer.
- Solo follows your track selection and track groups, the same way mute, record-arm and phase do.
Customize which channel-strip buttons show#
FreeDeclutter or extend every channel strip at once, hide Mute/Solo/Automation, or opt in to Rec-Arm and Phase, from one settings sheet.
How to use
- Open the top-bar overflow (kebab) while the Mixer tab is active.
- Tap “Mixer strip layout”.
- Toggle Show Mute / Show Solo / Show Automation (default on) and Show Rec-Arm / Show Phase / Show Input / Show Input Monitor / Show Fader dB (default off).
Keep the fader dB printed on every strip#
FreeShow each channel's level as a number under its fader all the time, not only while you are dragging it, so you can read the whole console at a glance.
How to use
- Open the top-bar overflow (kebab) while the Mixer tab is active.
- Tap “Mixer strip layout”.
- Set “Show Fader dB” to On.
Tips
- It is off by default, which is how the mixer has always looked.
- The live readout that appears while you drag is separate and always shows, on or off.
Invert a track's polarity (phase)#
FreeFlip a channel's polarity from the strip (useful for fixing phase cancellation between mic pairs), once enabled in Mixer strip layout.
How to use
- Enable “Show Phase” in Mixer strip layout (top-bar kebab) if not already on.
- Tap the Ø button that appears below Rec-Arm; it turns teal when active.
Arm a track for recording#
FreeToggle record-arm on a channel from the mixer, once you've turned the Rec-Arm button on in Mixer strip layout.
How to use
- Enable “Show Rec-Arm” in Mixer strip layout (top-bar kebab) if not already on.
- Tap the red “R” button that appears between Solo and the AUTO badge.
See REAPER's selected tracks highlighted#
FreeEvery track selected in REAPER, one or a dozen, deepens to its own colour on the iPad, so you can see at a glance which channels are in focus, including the master bus.
How to use
- Select one or more tracks in REAPER, or tap a strip on the iPad. Every selected strip deepens to a stronger wash of its own track colour.
Tips
- The highlight always shows REAPER’s selection, on every connected device. There is nothing to turn on.
- Selecting several tracks in REAPER highlights all of them, not just the first.
- Each strip keeps its own colour when selected, so a wide selection is still easy to read track by track.
- Turn the global “Follow” toggle on (top bar; Follow REAPER selection in ⋮ More) if you also want Channel Detail on this device to jump to whichever track REAPER selects. It is per-device, so one iPad parked on an EQ is not dragged around by another operator.
Use the mixer on a narrower window (adaptive top bar)#
FreeIn Split View or portrait, the top bar automatically folds lower-priority controls (metronome, Visible, Link, Fine, Auto, even the three tabs) into a single overflow menu so nothing clips. The console stays usable at any width.
How to use
- Resize the app (e.g. into iPad Split View) or rotate to portrait.
- Watch the top bar fold buttons into the More (⋮) menu as space tightens; tap More to reach folded items.
- At the narrowest widths, the three mode tabs themselves collapse into one dropdown selector.
Tips
- More groups its rows under Page (Control View’s Edit / Cancel, always first), Transport, Mixing, Editing, View, Actions and App headers. App (Customize toolbar…, Settings, Disconnect) is always last.
- To choose what the bar shows and what goes into More first, open More and tap Customize toolbar….
Flip the whole mixer into send mode so every strip's fader, pan, and mute controls that track's send to one chosen destination, the classic digital-console monitor-mix workflow, with banking, layers, and automation still live.
How to use
- Tap SoF in the top bar (left of Link). The destination picker opens.
- Pick the track you want to send to. The mixer flips into send mode: the button now reads “Send to {name}” and tints in that track’s color, and the canvas border picks up the same tint.
- Each strip now controls its own send to that destination: drag a fader for send level, the pan bar for send pan, tap M for send mute.
- Tap the SoF button again to exit back to the normal mixer.
Tips
- The solo slot becomes a routing button. Tap it to cycle the send between POST (post-fader), PREFX (pre-FX), and PRE (pre-fader).
- Banking, layers, and automation keep working exactly as in the normal mixer. The AUTO badge writes send-envelope automation in Touch/Latch/Write.
- To re-target, exit and tap SoF again; your pinned and recent destinations make re-picking fast.
- Sends on Fader is free. Every musician on stage can ride their own monitor mix from their own phone or tablet, with no unlock required.
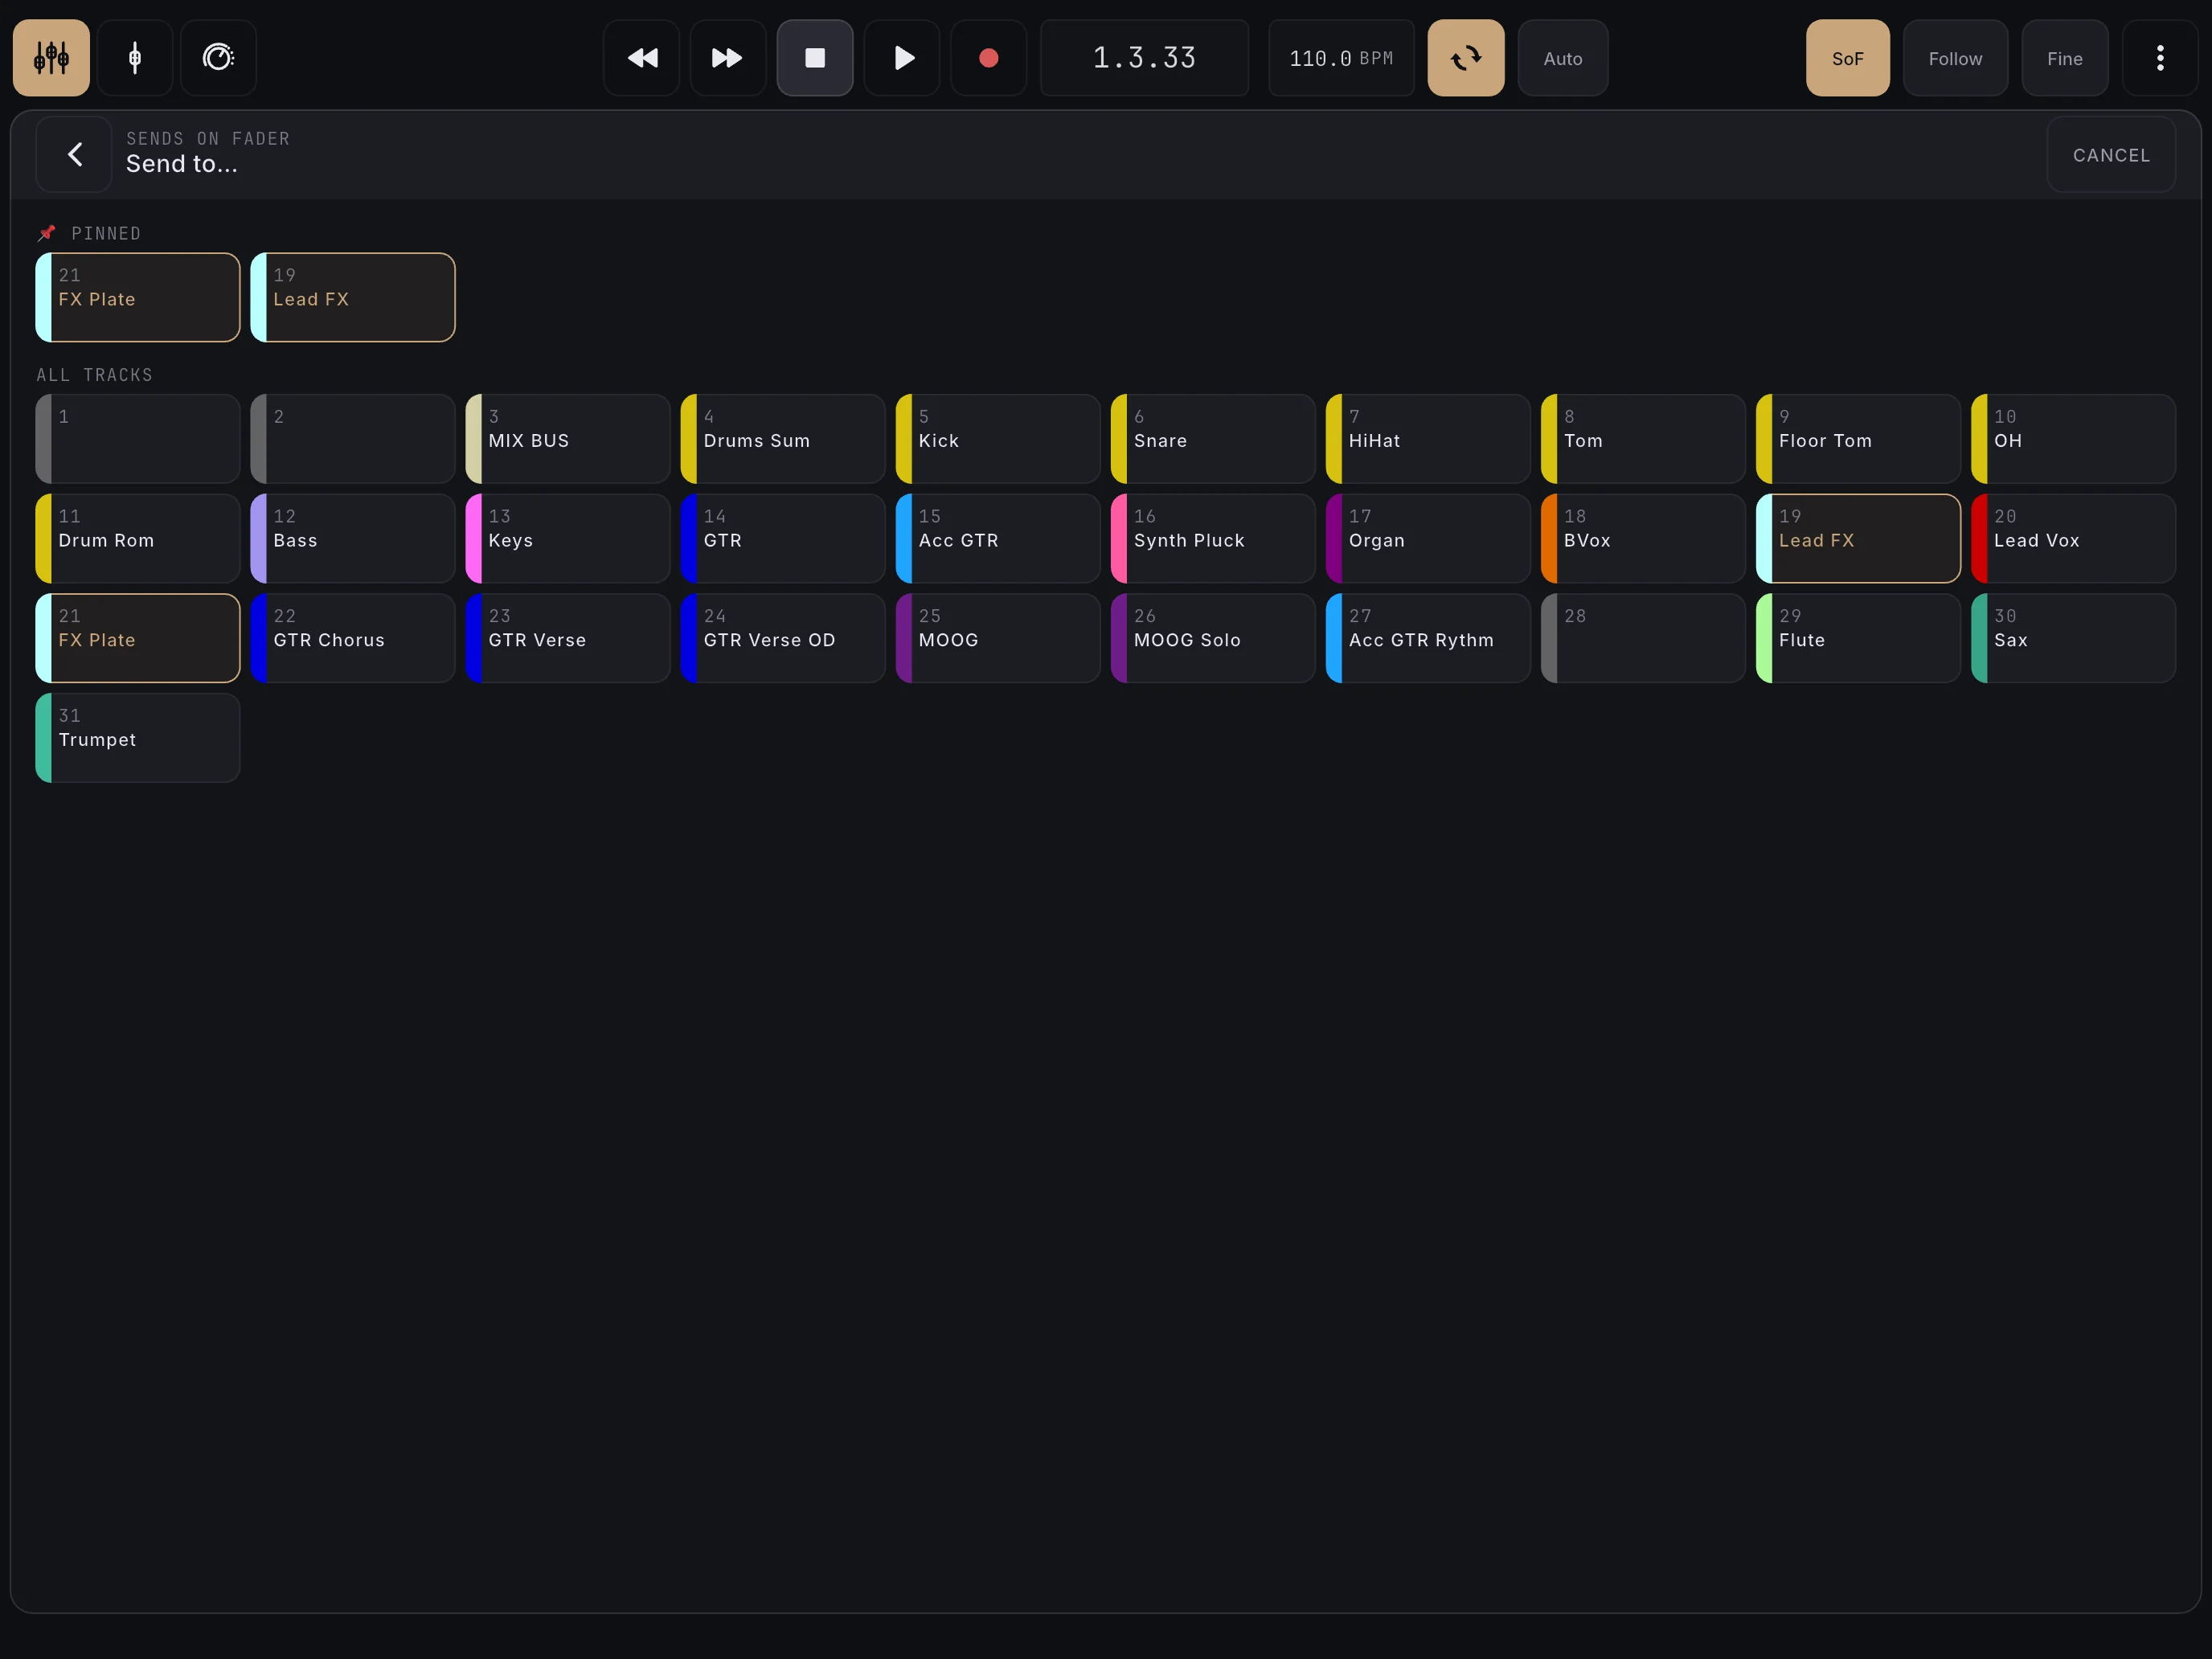
Choose which track Sends on Fader targets from a full-screen picker with your pinned and most-recent destinations up top. Long-press a track to pin it so your regular monitor and effect buses are always one tap away.
How to use
- Tap SoF in the top bar to open the destination picker.
- Scroll to find your destination under PINNED, RECENT, or ALL TRACKS, and tap it to enter send mode.
- To pin a track for quick access, long-press its card. It moves up to the PINNED section. Long-press again to unpin.
Tips
- The picker excludes the master bus and the track you’re already sending to.
- Pins and recents are saved per project and shared across every tablet connected to the session, so your monitor buses stay pinned on all of them.
Ride the aux master in Sends on Fader#
FreeWhile in send mode the master slot becomes the destination bus's own fader, so you can trim the whole aux/monitor mix from the same screen you're feeding it. The destination's strip is hidden from the bank so you never send it to itself.
How to use
- Enter Sends on Fader and pick a destination.
- Look at the pinned zone at the mixer’s edge. It now shows the destination bus itself, tagged AUX.
- Drag it to trim the destination bus’s own level, pan, or mute while the strips around it feed sends into it.
Tips
- The destination track is hidden from the strip bank while you’re sending to it. Its aux master slot is the only place it appears, so you can’t accidentally send it to itself.
- The aux master stays pinned at the edge on every layer and bank while you’re in Sends on Fader, even if you haven’t pinned master. Leaving Sends on Fader puts your own pins back exactly as they were.
In Sends on Fader, a track that has no send to the destination shows a silent, ghosted strip. Touch any of its controls and the send is created on the spot at −inf, so you can wire a monitor send routing-first before you raise the level.
How to use
- Enter Sends on Fader and pick a destination.
- A track with no send to that destination shows a silent, greyed-out strip.
- Touch any control (raise the fader, nudge the pan, tap mute, or cycle the routing button) and the send is created instantly with your change applied.
Tips
- Tap the routing button first to create the send pre-fader at −inf, then raise the fader, the classic “wire the monitor send silently, then bring it up” move.
- Pulling a fader all the way back to −inf leaves the send in place; it never deletes it.
A table of every track in the current layer, one row each, for naming, colouring, choosing a record input and setting monitoring without leaving the iPad. Whatever you have selected in REAPER is already linked when it opens, ready to rename or recolour together.
How to use
- Long-press a channel’s name strip in the mixer, or tap Track setup in the toolbar menu.
- Each row shows the track’s number, colour, name, monitoring and record input.
- Use the Layer / All switch in the header to widen the list from the active layer to every track in the project.
- Tap the back chevron when you are done. Nothing is staged: every edit is sent as you make it.
Tips
- The editor opens by itself after you add tracks, with the new tracks selected and therefore already linked.
- Select a range of strips in the mixer first and those rows are linked when it opens, so renaming or recolouring the whole range takes no re-linking. Inputs need no trip through here at all: tap the input cell on any selected strip in the mixer and the sheet already covers the selection.
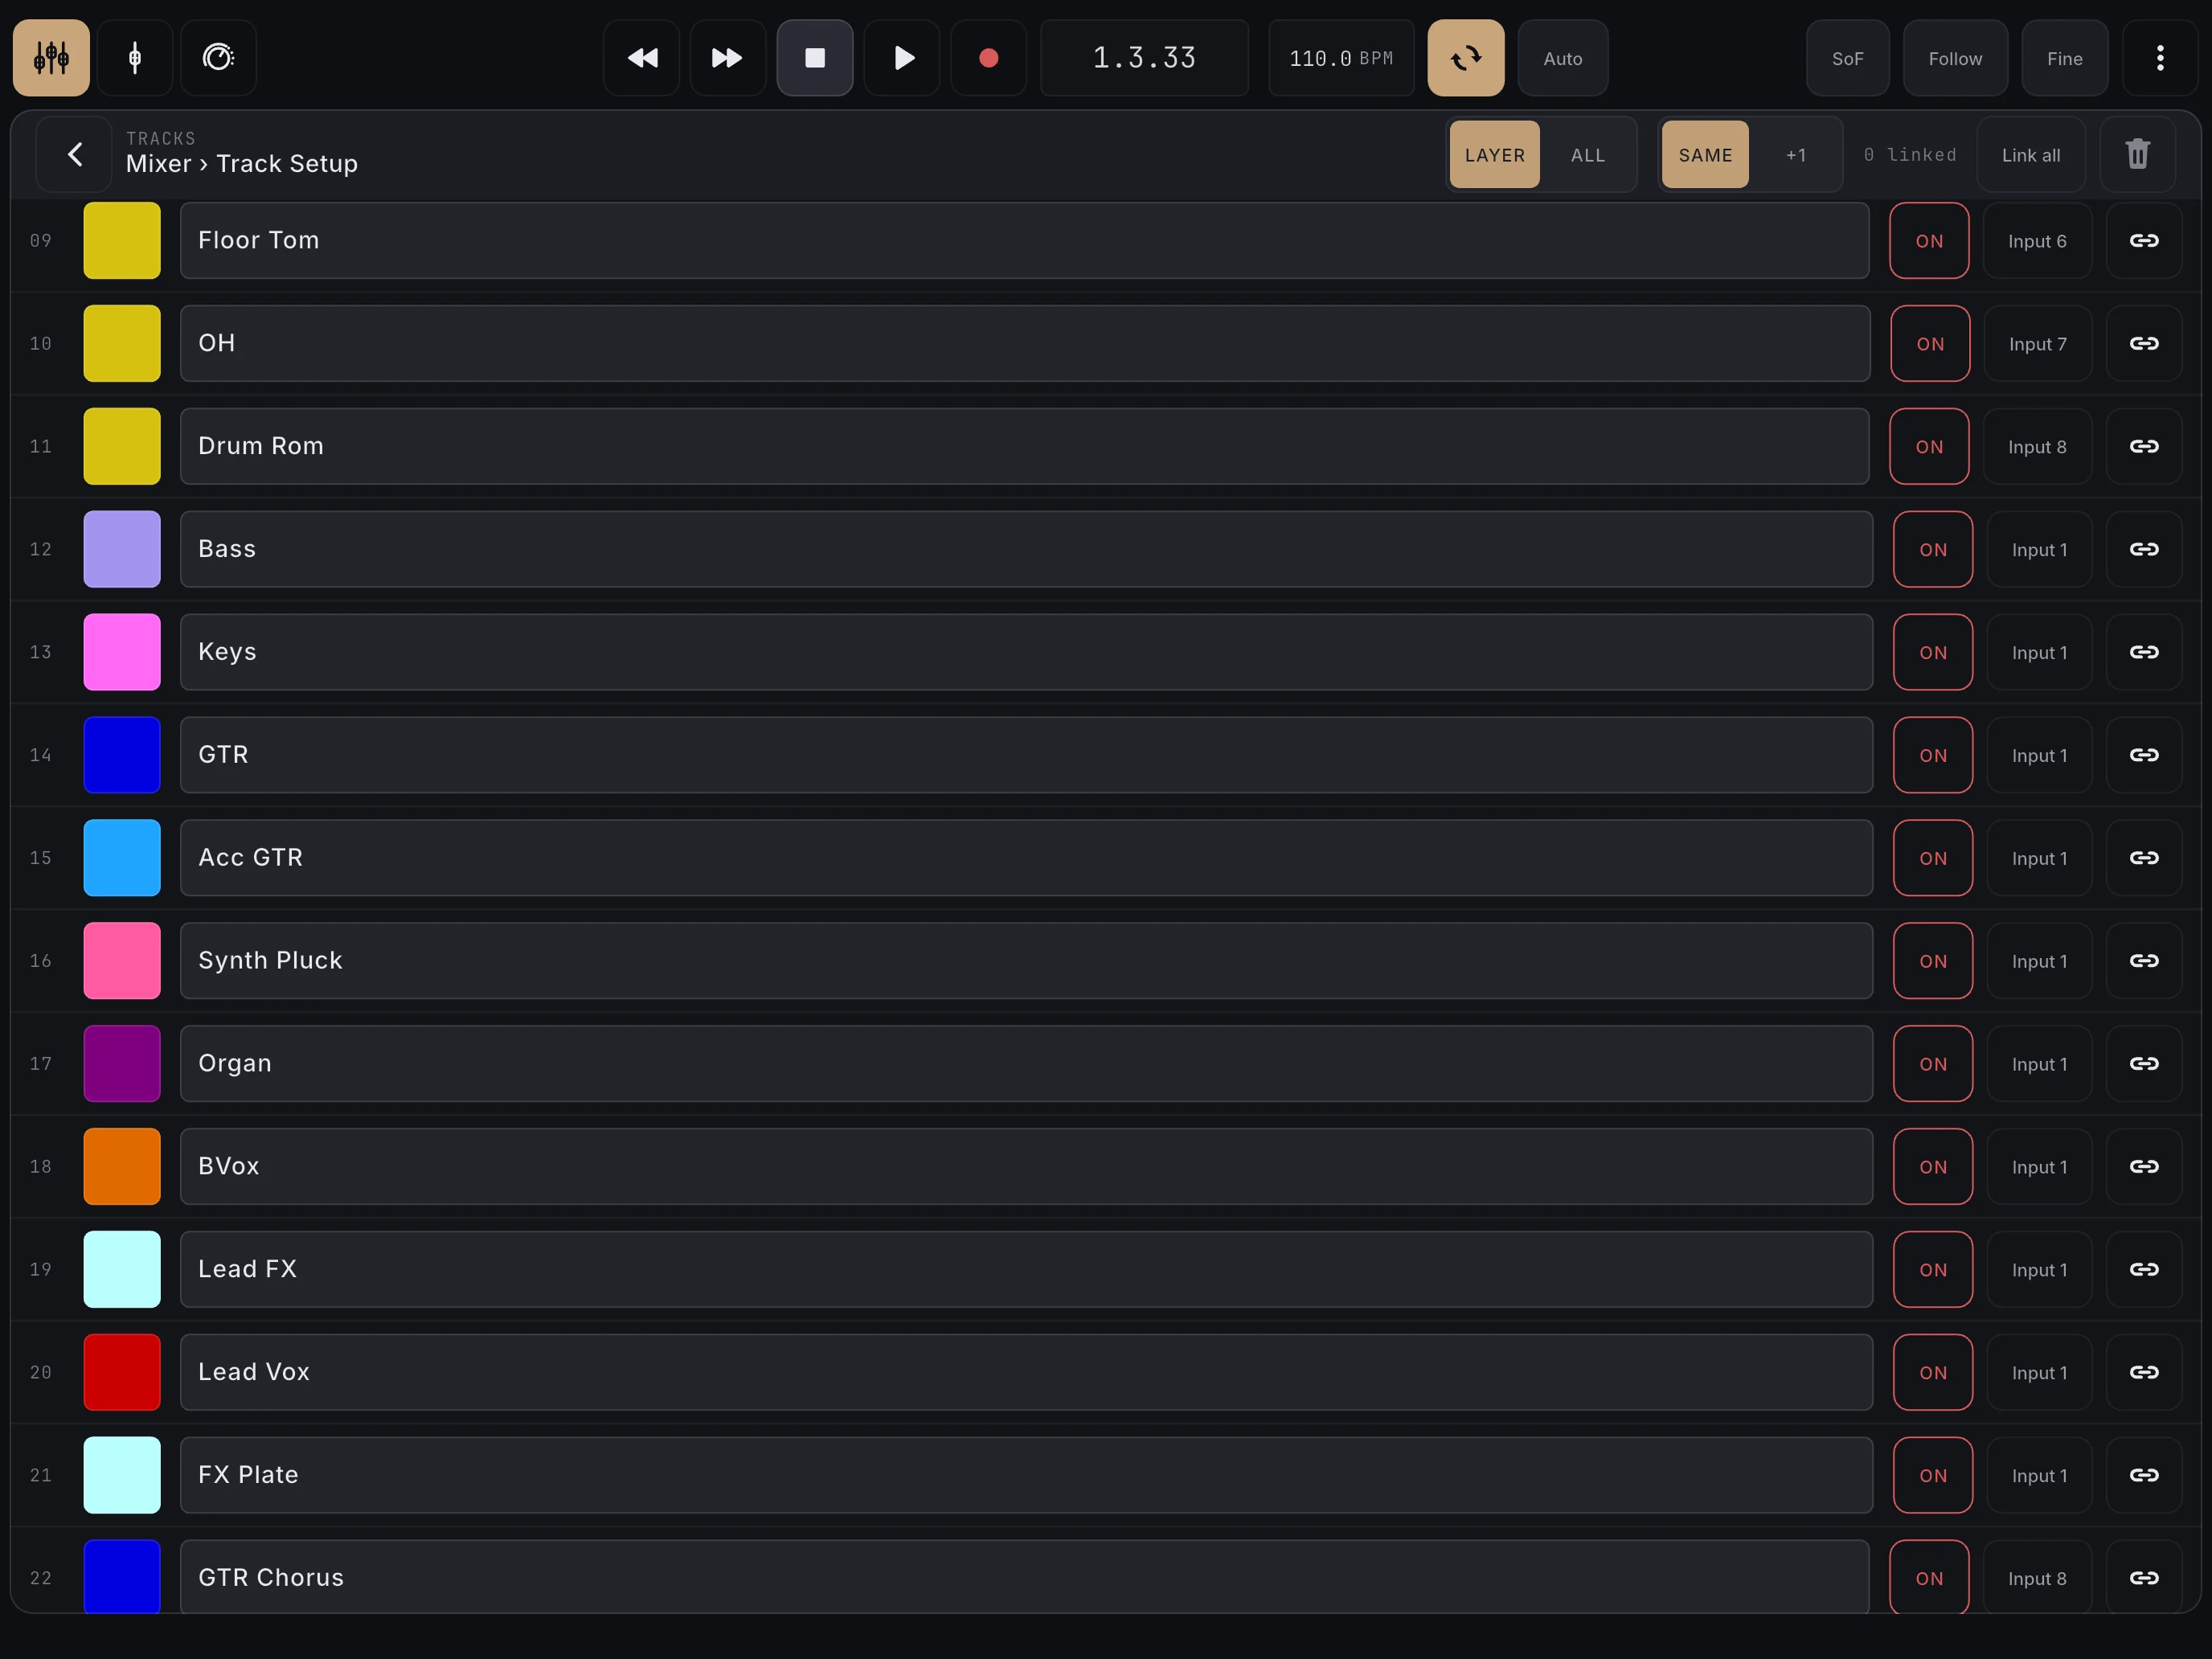
The linked rows are the tracks selected in REAPER. Tap a chain icon to add a row to the selection, and any single edit, a name, a colour, an input or a monitor mode, applies to every linked row.
How to use
- Tap the chain button at the end of each row you want to include.
- The header counts what you have linked, and linked rows are tinted.
- Edit any one of them. The change lands on every linked row.
- Use Link all / Unlink all in the header to take the whole visible list at once.
- For a run of neighbouring rows, slide down the chain column instead of tapping each one.
Tips
- Linked here means selected in REAPER. Whatever you had selected when you opened the editor is already linked, and linking a row here selects it in REAPER too.
- Because it is one selection, it moves live. Select something else in REAPER, or on another iPad, and the linked rows follow.
- The count only ever includes rows you can currently see. When more is selected than the view shows, the header names the rest: 4 linked (+2 off-screen selected).
- Link all takes the rows you can see and leaves anything else selected. Unlink all clears everything, including tracks out of view and the master, so the label is true.
- One thing does reach further than the count: monitoring. REAPER applies it to the whole selection, which is why the off-screen number is worth reading before you tap it.
Slide down the chain buttons to link every row you pass, or start on one that is already linked to unlink the run, so a set of twelve costs one gesture instead of twelve taps.
How to use
- Put your finger on the chain button of the first row you want.
- Slide straight down or up the column. Every row you pass tints as it joins.
- Lift. Those rows are now linked, and the header count includes them.
- To drop a run, start the same drag on a row that is already linked. It unlinks everything you pass.
Tips
- The row you start on decides which way it goes, so one gesture both links and unlinks.
- It adds to what you already had. Rows you linked earlier stay linked, and rows outside the run are left alone, so you can paint a block and then tap one or two out of it.
- Painting the column selects those tracks in REAPER, exactly as painting a range of mixer strips does.
- Nothing changes until you lift, so you can slide back and forth to settle on the run first.
- Only the chain column paints. Start anywhere else on a row and the list scrolls as usual.
- Sliding past the last row stops there. To cover more than a screenful, paint what you can see, scroll, and paint again.
Rename one track, or name a whole linked set at once. With +1 on, a name that ends in a number continues the count down the set: Vox 1, Vox 2, Vox 3.
How to use
- Link the rows you want to name.
- Set the header switch to Same to give every row the identical name, or +1 to number them.
- Tap into the name field of the row where the sequence should start, type the name, and press Done.
- With +1, rows above the one you edited are left alone. The sequence runs downward from where you typed.
Tips
- +1 only continues a name that already ends in a number. Type “Vox 1” to get Vox 1, Vox 2, Vox 3. Type “Drums” and every row gets “Drums”: no number is invented for you.
- Zero padding is kept, so “Tom 01” continues Tom 02, Tom 03.
- +1 applies to names only. Inputs have their own sequential assignment, see the related card.
Pick what a track records from: a mono channel, a stereo pair, or a MIDI channel on one device or on all of them. The same sheet in the mixer and in Track Setup, and it covers every track the edit will touch. Mirrors REAPER's own input menu, split so no level is a long list.
How to use
- Tap the input cell on the row you want to change.
- Pick a branch: Mono, Stereo, MIDI, or None.
- Drill in to the channel you want. MIDI splits into scope, then channel, so no list is longer than a screen.
- Tap your choice. The sheet closes and the input is set on every track the edit covers: the linked rows in Track Setup, or the selected strips in the mixer.
Tips
- The sheet always spells out what the track is listening to right now, at every level.
- Above one track it says “Applies to N tracks” at the top, and offers “Assign inputs sequentially” so the set can walk the interface instead of sharing one input.
- MIDI lists All devices first, then each enabled device. Both drill to the same channel list, so you can record all MIDI inputs on channel 3, or one keyboard on channel 3, whichever you meant.
- If it says there are no audio inputs, REAPER has most likely closed its audio device because it is in the background. Bring REAPER to the front and tap Retry.
Give several tracks consecutive inputs in one move: inputs 6, 7, 8, 9 down the set, or stereo pairs from 2/3, or one MIDI device per track. Offered wherever you tap an input across more than one track, in the mixer and in Track Setup alike. Each start says how many inputs it will use before you commit.
How to use
- Point at the tracks you want to fill. In the mixer, select them: tap one strip’s name plate, or slide across a range. In Track Setup, link the rows.
- Tap the input cell on any of them.
- Choose “Assign inputs sequentially”.
- Pick how to walk the hardware: Mono, Stereo, MIDI or MIDI per track.
- Pick where the run starts. Each start states the count it will use and the range it will reach, for example “Input 6 (7 inputs)” with “6-12” alongside. MIDI asks for the scope first, so a channel run can walk one device or all of them.
Tips
- The run always goes in track order, top to bottom, whichever track you tapped to open the sheet.
- The count is what the run will actually reach, not what you asked for. On an 8 in interface with 10 tracks it will say 8, and the last two are left untouched, with a note telling you how many were set.
- Stereo pairs step by two from wherever you start them, so a run from 2/3 goes 2/3, 4/5, 6/7 and never 3/4.
- A start with nothing left to walk into is not offered. The last input on the interface would fill one track, which is the plain choice one level up.
- The entry only appears when more than one track will be filled. The sheet says “Applies to N tracks” at the top so you can see the reach before you commit.
- The master is never part of the count. It has no record input.
Cycle a track's input monitoring between Off, On and Auto (tape style), for one track, a whole linked set, or everything selected in REAPER.
How to use
- Tap the monitor button on a row to step Off, On, Auto, then back to Off.
- Link rows first if you want the whole set to follow.
Tips
- Auto is REAPER’s tape style monitoring: input while stopped or recording, playback while playing.
- Monitoring follows a selection and a track group, like mute, solo, record-arm and phase. Select a range in the mixer and one tap moves all of them.
- That also applies here, and it now applies every time: the linked rows are the selected tracks, so a monitor tap always reaches the whole selection. When part of that selection is out of view, the header says so beside the count: 3 linked (+2 off-screen selected).
- Unlink all clears everything, out of view included, so it is the reliable way to be sure a monitor tap reaches only what you are looking at.